
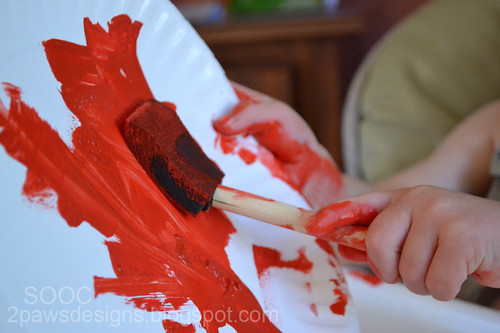
I duplicated the background layer again and used the noise filter, but quickly got rid of it. It softened the lines in the paint strokes and the little lines on Dylan's hands - both I liked a lot and make the photo so I wanted to leave them alone.
My next step was to add a hue/saturation adjustment layer. I left the hue alone. Lowered the saturation to -13 and the lightness to -1. I then duplicated the layer. Changed the new layer to "saturation" mode. Adjusted the master hue/saturation settings (-8, -8, -16) and the red settings (-4, +29, +2).
I added a brightness/contrast adjustment layer (-11, +10) and a gradient adjustment layer. I used the black/white gradient at 100% opacity. I changed the layer's mode to soft light and the opacity to 25%.

Join in the fun with Forever'n Ever'n Always Photography and Ramblings and Photos:

Also linking up to You Capture.


I really like what you've done here with your edit and I appreciate you walking through your steps - if nothing else, it'll help you remember what you did for future edits. :)
ReplyDeleteyou did this perfectly! great job!
ReplyDeleteWhat a difference the editing makes! Love all that red!
ReplyDeleteWow, what a fabulous shot! I appreciate reading your choices: I am still trying to figure out why I'm doing what I'm doing!
ReplyDeleteWhat a great edit - and so easy to follow your steps. I too sometimes don't do a noise reduction as it just takes away far too much of the detail.
ReplyDeleteRosie