Showing posts with label Photoshop. Show all posts

2/25/2013

Chalkboard Wine Labels

What happens when a friend is planning a party and also follows you on Pinterest? You get random emails asking you to recreate something you just pinned. ;) Which is how another pin that might have been a "someday" became a quick reality!

The party was for her husband's 40th birthday and she wanted to give out small wine bottles for favors. Where I came in - creating custom chalkboard labels to add to the bottles. The tutorial I had pinned was for creating chalkboard images in Photoshop and included free chalkboard backgrounds to download. Easy enough. The catch - the tutorial used hand lettering scanned in. I've never been the best at lettering. Possibly could do it if I'd just sketch more. Something I haven't made a priority in a long time. So, I quickly went in search of some fun, free fonts to try to create something similar.


I used a mix of two fonts one for the numbers and one for the letters (Chalk Hand Lettering Shaded). Played around with text sizes. Added a border. And set up a sheet for her to print onto labels.


With the addition of kraft tags she made, the bottles looked great and certainly were a fun favor.

10/31/2012

Happy Halloween!

This past Saturday it was once again time for our playgroup's annual Halloween party. Everyone came dressed for the festivities ....


Our family theme this year was Monsters Inc. The idea started back in the spring when I stumbled across a kids' Sulley costume at Goodwill for $5. I bought it thinking it would be fun for Dylan's dress up collection but later decided it would work great for Halloween.

We tried for a family photo similar to last year, but, while he posed for the kids' shot and the group one above, our little monster refused to pose with just us. I tried begging to no avail ...


Nope. Not happening. So Trent & I posed just the two of us ...


I made both of our costumes. For the Mike costume, I took a green t-shirt we already owned and added fabric to create a giant eye and smile. The hardhat was a thrift find (50 cents). I spray painted it blue using paint leftover from my canvas art project and added a sitcker with the Monsters Inc logo that I created in Photoshop.


For the Boo costume, I used her monster costume as inspiration. I combined a sparkly purple dress and sheer gray top - both thrift finds ($7 total). The hat I created using purple felt, leftover white fabric from Mike's eye (teeth), batting, a headband (free from the NC State Fair last month. I just added sticker "eyes" over the original stickers), and yarn (hair).


All in all I spent under $20 to outfit all 3 of us. Hopefully I can do just as well next year and we can get a true family photo. Maybe.

Happy Halloween!

7/27/2012

Friday Freebie: Aquarium template

I have a 2-page 12x12 digital scrabpooking template to share this month! It's based off the Aquarium page I created last fall and contains 11 layers. It's free for personal use only.


Click here to download the Aquarium template

Enjoy!

Have you missed one of my previous digital freebies? Click HERE to find them. And, don't forget to subscribe to my feeds so you won't miss future freebies!

6/22/2012

Mother's Day 2011

I made a very quick layout for last year's Mother's Day. None of the photos were especially great. Trying to get Dylan to cooperate for a picture took a lot of work and, when he finally agreed, he wanted us sitting on the ottoman in front of the TV (I can't tell you how happy I was to get photos at the arboretum this year - so much better!).


Knowing that I only wanted the one photo and to crop it considerably, I looked to my folder of Quick Page templates. I literally just edited the photo using the Vintage action from the CoffeeShop blog to soften the colors, stuck it behind the quick page and added "Mother's Day 2011" to the frame. That's it. Done.

Supplies: iNSD Quick Page by Tiffany Bodily; Script MT Bold font; Vintage action from The CoffeeShop Blog.

6/18/2012

Father's Day Superhero

My inspiration for Father's Day this year came from all the superhero elements I had seen (scrapbooking kits, movies, pillowcases, etc). I had the general idea of getting a photo of Dylan in his Superman shirt with "Dada, you're my superhero!" It took a little coaxing to get my now opinionated child to participate. He likes to pick his own shirt and I had to work hard to convince him to wear the Superman one for at least a few minutes. He also likes to choose at times when and where he wants his photo taken. Naturally, my suggestions originally were ignored. I snapped shots regardless hoping to get something and I did by patiently following his lead.

Father's Day Superhero

When he finally moved in front of my herb garden (better background and no direct sun) plus blew a kiss and made the best smile - I managed to get not just the one photo I had hope for, but three! I edited each using Ashley's Nice & Easy and Momaziggy's Gold Glory actions, cropped and outlined to mimic a comic strip. Then added the text in Marker font below (I see now I made a typo in adding a space between super & hero - oops!) and had it printed at 8x10 for Dylan to give to his father along with a card he made.

After breakfast and gifts, the three of us went to Bond Park to spend some time together. We had fun strolling the paths, watching the boats and playing at the playground. I haven't even had the chance to look at the photos I took on my DSLR, but this shot taken with my iPhone and edited with Instagram is a favorite:
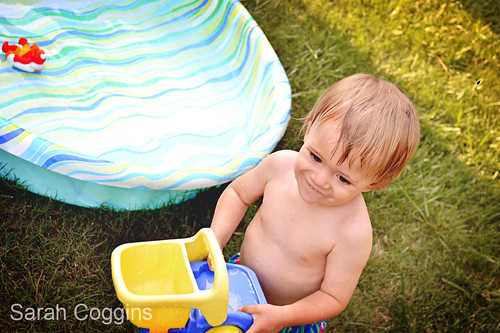

Like father, like son. :)

6/12/2012

"Dad" card

Last year I made hybrid cards for our fathers for Father's Day:


I started with a simple 5.5" x 8" rectangle and added a 5" x 7.5" mask in the center. This allowed me to easily layer two papers to create the background. I printed these onto white cardstock, cut to size and scored it at the 4" line to create the fold.


Next, I opened a pennant flag element from the Give Thanks kit and added "DAD" using brushes. I printed these onto white cardstock as well, cut out and then adhered to the cards with adhesive backed foam to give the design a bit of dimension.


Simple as that and they each had a beautiful handmade card.

Are you making cards this year? I'd love to see. Share a link to the post or image in the comments section. :)

Supplies: Give Thanks & Happy Camper kits by Sara Schmutz; Digi Essentials 8 by Karla Dudley; white cardstock; adhesive backed foam.

5/07/2012

Week in the Life 2012: Complete

My Week in the Life 2012 album is complete! I ordered it as an 8x8 photo book from Shutterfly last night.

WITL2012: Title Page
Title Page
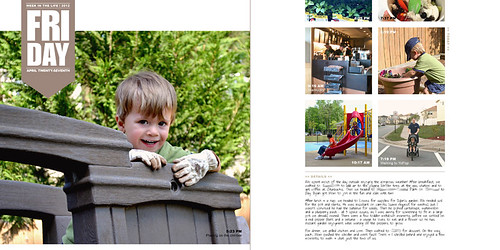
I decided to keep each of my days to 2 pages -  a main photo with the banner title on the first page and a photo collage with journaling on the second page. Honestly, I had six of the seven main photos selected before I realized Dylan was in every one which helped me picked the final one (Tuesday - not a lot of good & good quality photos that day). He might as well be in them all. :)

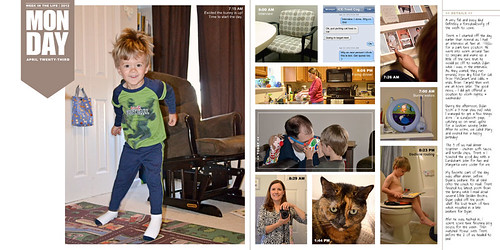
WITL2012: Monday spread
Monday, April 23rd


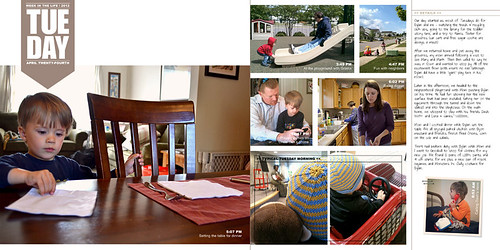
WITL2012: Tuesday spread
Tuesday, April 24th


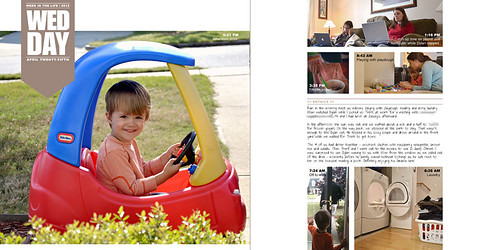
WITL2012: Wednesday spread
Wednesday, April 25th


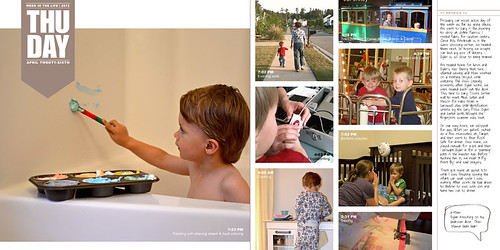
WITL2012: Thursday spread
Thursday, April 26th


WITL2012: Friday spread
Friday, April 27th

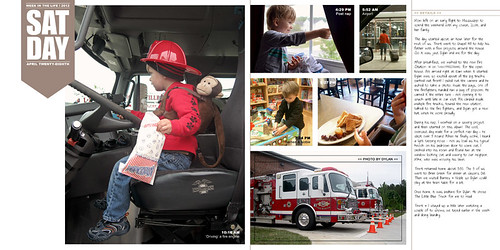
The photo of the fire engines was taken by Dylan using my point & shoot camera. I altered the template text box to note that. It was important to me to include a bit from his view of the week.

WITL2012: Saturday spread
Saturday, April 28th


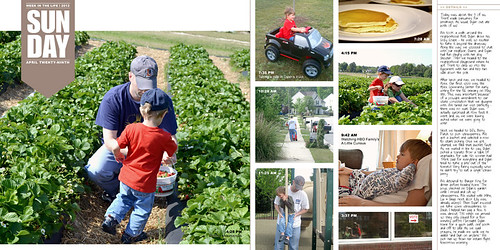
WITL2012: Sunday spread
Sunday, April 29th

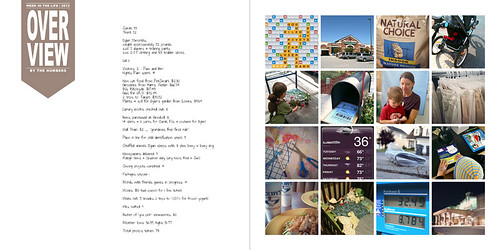
Following the "day pages" - I took inspiration from a Week in the Life closing page shared by Kristen W on Flickr. I liked the idea of a count of various parts of the week. Ours includes our ages; Dylan's stats (weight, height & clothing sizes); amount spent on groceries, gas, movies; number of miles walked; temperature fluctuations; etc. Across from it, I created a page with corresponding photos.

WITL2012: Overview spread
Overview: By the Numbers

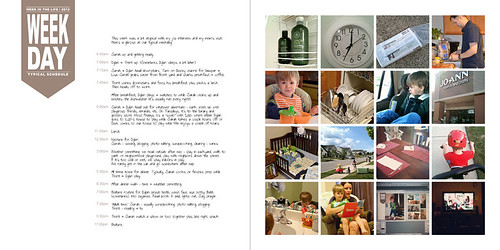
Finally, since our week was unusual in several respects, I decided to finish the album with a spread documenting a "typical" weekday in our home right now since I'm sure by the next time we do this, it will have changed.

WITL2012: Typical Weekday Schedule
Weekday: Typical Schedule

Supplies: Week in the Life 12x12 Vol. 4 Layered Template Album and December Daily Layered Template Package Vol. 3 by Ali Edwards; Instagram app; Digi Essentials by Karla Dudley; Tweet, Tweet collaboration kit from oscraps.com; Arial, Arial Bold & Just the Way You Are fonts.

5/04/2012

Week in the Life 2012: Putting it Together

I have completed all the "day" pages for my Week in the Life album as well as a title page and ending page in Photoshop. I wanted to focus on the photos & text so I've pretty much stuck strictly to the templates with almost no embellishment.


I've started arranging the pages into a Shutterfly photo book. Next I need to create my cover. I'm thinking something similar to this (also still considering her idea of 3 years in one album as I would like to get pages for the previous 2 years completed).

Supplies: Week in the Life 12x12 Vol. 4 Layered Template Album by Ali Edwards; Instagram app; Digi Essentials by Karla Dudley; Tweet, Tweet collaboration kit from oscraps.com.

5/01/2012

Week in the Life 2012: In Progress

The last two years I've taken photos & notes for Week in the Life. I haven't completed a single album though! Hoping third time's the charm. Last week, I started again. I took photos daily using all 3 cameras (DSLR, point & shoot and iPhone) depending on the moment & convenience (not to mention, that is real life - I use all 3) and took notes using the printouts by Ali Edwards.

I averaged 100 photos per day. That by no means equals 100 good shots. There were bad shots and repeats. I sorted them all by day into folders and then have been going through ruthlessly deleting.


I started on my album on Saturday because I wanted to and felt inspired. I really, really want to get this one completed! :)

My initial plan was to use Ali's Week in the Life volume 4 templates and create it all digitally. As I started adding photos, I looked back at her completed album from last year and lifted the idea of adding times and notes on top of photos. I like how that helps define the day while letting me place photos randomly (vs in chronological order) and write my journaling in a more relaxed format.


I'm still working on adding photos and text to the main "day" pages. I currently have two pages per day - a title page with large photo & banner title and an adjacent page with smaller photos & journaling. I'm undecided still on embellishments. I want to keep the design simple with the focus on the photos so, whatever I do, I expect it will be minimal. I'm also thinking of adding a few extra pages that detail a few current things in our lives that might not have been picked up in during the past week. That's perhaps a little vague, but keep in mind, I'm still working out my plan on that myself! Focusing on finishing the day pages first.

3/19/2012

Mad March Competition - Round 2

I made it through Round 1 of the Mad March Digital Scrapbooking Competition at Design House Digital! The challenge for Round 2 was to use each of the following items in a layout:  Mist, Alpha, Doodle, Neutral, Eyelet, Stitching and Stripes (get it? "madness").


I decided to create a page about taking Dylan to the theater to see The Lorax. For the doodle, I used my tablet to sketch "truffula" trees in Photoshop based on the sketches in the book by Dr. Seuss.

Supplies: DHD National Scrapbooking Day 2011 Blog Hop kit; Gennifer Bursett's Toolbox Mist Vol. 1; Robyn Meierotto's Mellow alpha, In Stitches - Bright Basics, & Kraft Fun Day elements; Karla Dudley's Felis elements; Tiffany Tillman's Baby Dinos elements; Century Gothic, Janda Everyday Casual and Times Roman fonts.

12/30/2011

Shoot and Edit: week 51 edit

My edits for this week ...

For the plane shot, I used Ashley's Nice & Easy action tweaking layers to taste. Cropped the photo to remove the light posts and added a vignette.

Week 51: New Year 1 edit

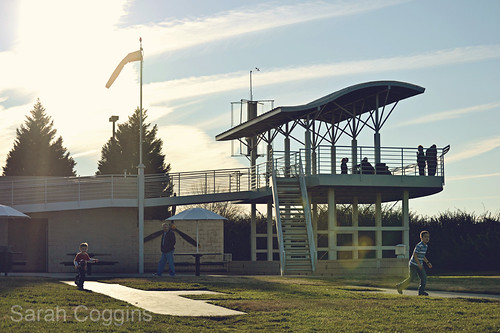
For the observation deck photo, I again started with Ashley's Nice & Easy action. Merged all layers. Then used the Gold Glory action from Momaziggy's Jewel Tone Wash Collection, again adjusting the layers to taste, to add a warmer feel.

Week 51: New Year 2 edit

Join in the fun with Jill Samter Photography and Ramblings and Photos:

12/23/2011

Shoot and Edit: Holiday Traditions edit

I loved Dylan's smile, but disliked the darkness of my SOOC shot this week. For my edit, I started with Ashley's Nice & Easy action - adjusting the layers to taste. Merged all. Then used The CoffeeShop Blog's Storybook Vintage action to give the image a softer, warmer look.

Week 50: Holiday Traditions edit
Join in the fun with Jill Samter Photography and Ramblings and Photos:

12/09/2011

Shoot and Edit: Holiday - Christmas edit

Another quick & easy editing week as I was pretty pleased with my SOOC shot. I used Ashley's Nice & Easy action - adjusting the layers to taste. Then added a vignette via steps in this video.

Week 48: Christmas edit
Join in the fun with Jill Samter Photography and Ramblings and Photos:


And, many thanks to all who voted for my SOOC shot as best of November

12/02/2011

Shoot and Edit: Thanksgiving edit

I ran through this edit pretty quickly last night with the help of a couple of actions...
  • Ashley's Nice & Easy action - adjusted layers to taste;
  • HDR action minus the HDR_for_Dummies2 portion - I only used the shadow portions, as I didn't like what the other part did to the photo;
  • added a new Hue/Saturation layer and adjusted;
  • rotated the image (not too unusual for me - my shot was crooked! Sure the subjects were straight, but we were on an incline and it was pretty obvious distraction to me to see the white house in the background tilted.) and cropped.
Thanksgiving edit
Join in the fun with Jill Samter Photography and Ramblings and Photos:

11/11/2011

Shoot and Edit: Macro edit

I was quite pleased with my SOOC shot this week. I kept my edit very simple - ran Ashley's Nice & Easy action and adjusted the layers to taste.

Week 44: Macro edit
Join in the fun with Jill Samter Photography and Ramblings and Photos:

10/28/2011

Shoot and Edit: Memories edit

I used a couple of actions this week to brighten up my photo:

Week 42: Memories edit

Join in the fun with Jill Samter Photography and Ramblings and Photos:

10/20/2011

Shoot and Edit: Pumpkin edit

I kept my edit this week very simple. I used Ashley's Nice & Easy action. Tweaked the various layers. Then merged and cropped. That's it.

Week 41: Pumpkin edit

Join in the fun with Jill Samter Photography and Ramblings and Photos:

10/07/2011

Shoot & Edit: Orange edit

One of the things I disliked about my SOOC shot was how dark it was. I was able to fix it with a very quick & simple edit. I started with Ashey's Nice & Easy action then followed steps from Sarah at Naptime Momtog for the HDR action. Mouseover to see the difference.

Week 39: Orange edit
Join in the fun with Jill Samter Photography and Ramblings and Photos:

8/19/2011

Shoot and Edit: Bright & Colorful

Week 32: Bright & Colorful SOOC
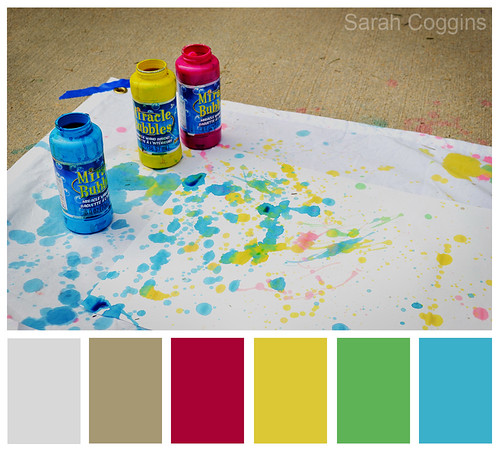
I started this week's edit by adjusting the levels on the photo. Then used Lustrous Pop action from the CoffeeShop Blog to brighten. I actually had the image a bit brighter, but found the white too blinding! So I dulled it back a bit. Then added a vignette and used the Color Bar template also from the CoffeeShop Blog.

Week 32: Bright & Colorful edit w/ color bar

Join in the fun with Jill Samter Photography and Ramblings and Photos:

8/06/2011

Shoot and Edit: Sunset edit

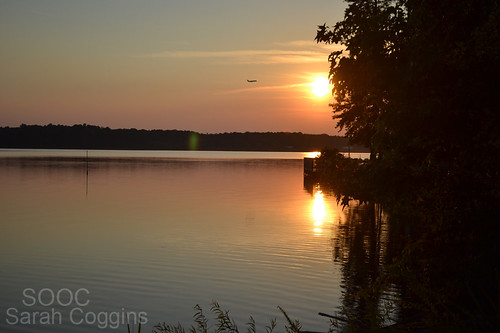
Week 30: Sunset SOOC
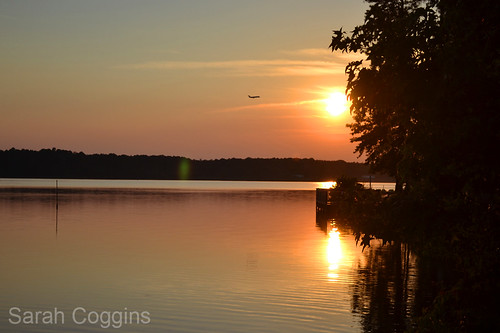
I was a bit stumped on how to edit my photo this week until I read Rosie's steps at leavesandbloom photography. That inspired my starting point - adding a selective color layer & adjusting the black. From there I added a hue/saturation layer. Adjusted to my liking. Merged layers and cropped.

Overall, I'm still very happy with my SOOC shot but I do like the focus and more intense orange color in the edit.

Week 30: Sunset edit

Join in the fun with Jill Samter Photography and Ramblings and Photos: