Showing posts with label scrap room. Show all posts

6/11/2010

Sneak Peek

A little sneak peek at something I'm working on for my Etsy shop ...


And, a peek into my new craft space ...


The room is slowly coming together.  I am loving all the natural light from the big window right next to my desk.  This was definitely a great change to make.

Bookmark and Share

5/26/2010

Room Remix

For a while I have been thinking about moving Dylan to a new room. Originally he was in the larger of our 2 extra bedrooms and shared space with the full size guest bed. This worked really well at times particularly when he was sick in December and he & I spent nearly a full 48 hours in there together. It was nice to be able to tuck us both into the big bed and have all of his stuff (diapers, medicine, etc) at hand.

As he's grown (and we've had overnight guests stay more frequently ... ie, Grama :D ), this has not been the most ideal situation. I do think he and my mom had quite a good time playing "peek-a-boo" through and over the rails at each other during her last stay. But we all need sleep so I began to think about putting him into a new room.

One of the pros or cons of me being a stay-at-home mommy now is the simple fact that I am here enough to see what is/isn't working, what we do/don't use, what I do/don't like, etc. Last year I created a 3D model using Google Sketchup to help arrange the furniture in the nursery/guestroom. I went back to that model and updated it to match how the furniture was currently arranged:

Then I drew the second room (the former computer/scrap room) and began drawing & repositioning the various pieces of furniture to determine the new arrangement.

The new layout of the guest room:
The bed remained in the same place. The computer desk and scrapping desk run along the wall between the two rooms and the Crop In Style cubes sit between the foot of the bed and the closet.

Dylan's new room:

I started taking apart the computer/scrap room about two weeks ago. I patched and touched up the paint where the shelving and pictures hung. Since the room was originally painted with "regular paint" (ie, before the no-VOC paint option we now have) and I just wanted to touch-up versus totally repaint, I let it sit for a few days to air out before moving Dylan into the room.

As of the beginning of the week, all of the furniture is in place in each room. I'm now focusing on organizing and decorating. Dylan's new room is taking on more of the feel of a toddler room now that he's more mobile. The built-in shelves in the corner by the glider once held old textbooks and scrapping magazines as well as knick knacks. Now they are taking on childhood favorites and stuffed animals. I confess, I'm having fun looking through Flickr again for more inspiration. His room will still have an animal theme (after all, I did just finish the zoo print crib teething rail cover). But some of the details are changing. I'll share photos as the rooms progress.

ETA: If you decide to play with Google Sketchup (it's free!), be sure to check out the 3D Warehouse for free models you can download (I did this for the glider and Aeron chair). And I have begun sharing some of my own models as well - 2pD Models. Enjoy!

Bookmark and Share

1/26/2009

Nesting?

After church yesterday, we stopped by Home Depot to get paint chips as part of deciding on a color for the nursery/guest room. I've been a fan of their Freshaire paint since using it last summer in our master bath and in my sister & brother-in-law's living room. It has no VOC's = no smell = better for the environment and us. Particularly since I don't want to breathe in any extra fumes right now that might harm the baby.


The plan for the day - get the paint chips. Simple and easy enough, right? haha These things are never that simple in our home.

Backing up over a year ago ... Trent & I moved our treadmill out of the computer/scrap room and into the guest room. Now the treadmill needs to come back to make room for the crib and that needs to happen before painting the room. Ok, still not a big project. I assumed we would just stick it where it used to sit. Somehow this discussion turned into "how can we redesign the computer/scrap room layout." Wait. Wasn't the project the nursery/guest room? Uh huh. And now? Well, let's just say the closet in the computer/scrap room is almost completely empty and all the wire shelving has been ripped out.

A few friends pointed out to me on Facebook that I'm "nesting." Uh, oh. We have a lot of time left on our hands before the little one arrives. And there's still quite a few things on last year's list of possible house projects. Looks like 2009 will be anything but boring around here. And, of course, I'll share the details as the chaos ensues. ;)

9/01/2008

Late Last Night

I attempted to scrap


while Chester did a little virtual fishing


8/02/2008

Inspiration

Inspire your creativity with a little eye candy from Flickr groups. Here are a few I enjoy:
What are some favorites of yours that I should check out?

6/07/2008

More Organization Ideas

I'm on a cleaning kick today. Straightening up and rearranging some of the items in my scrap room. It started off as a small project - working in room for a new album in my Crop In Style unit. Then exploded into "well, if I move this here...and that there..." I think you get the picture. ;) They aren't major changes, but hopefully will help me tidy up a bit and rework my expanding collection of pages & supplies.

If you're feeling in the mood to do a little reorganizing as well and need some inspiration, take a look at these fun blogs that share ideas from other scrappers: Crafty Storage & ScrapScene (I was included in the most recent post on ribbon storage HERE).

Or maybe browse the Craft Rooms group at Flickr.

5/09/2008

Scrap Organization {Stickers & Rub-ons}

Over the years, my stash of scrapping supplies has grown. This includes lots and lots of stickers and rub-ons. I used to keep them in a single poly 8.5x11 envelope. When it was about the bust at the seams, I found an idea on Two Peas from another member to organize them in a binder using these 99cent poly envelopes from Target:


This has been wonderful for me. The envelopes come in several colors, all translucent. I prefer the clear so I stocked up on several trips. Each holds a category - letters, words, kids, animals, etc. I labeled them using my Dymo label maker.

4/19/2008

Weighing In & Rub-ons in Cute Tins

This morning I took Cali to the vet for her weigh-in. During her check-up in January, she was down to 9.1 lbs. The vet had agreed to try my idea of monitoring her food more (Chester is our little resident piglet & food stealer) to see if we could get her weight back in a healthy range. I was very happy to see 10.5 lbs on the scale. :) Now to maintain it with both cats officially spoiled and expecting canned food twice a day will be the tricky part.

I spent a bit of time afterwards cleaning up in my scrap room and putting away some new supplies. I went to Big Lots yesterday in search of American Crafts products. They had a good assortment of rub-ons & ribbons. I also found some cute Making Memories products.

I've been storing small rub-on packs from Making Memories & Doodlebug Designs in my PB Kids art caddy. It's right beside my desk making them easy to grab. I wanted to keep the new AC ones out as well. Thankfully I picked up a couple metal tins from the $ spot at Target earlier this month. They fit perfectly in one on the corner of my desk.

4/04/2008

Ribbon Ring

When I reorganized my scrap room last year, I devoted one drawer in my Crop In Style unit to Ribbons & Punches. I don't have a large amount of either so they fit nicely. The down side to this solution is that the drawer is getting full and I'll often forget about the ribbon while working on a project because it is out of sight.

When I received an email on April Fools' Day asking if I'd be interested in trying the Ribbon Ring, I about fell out of my chair. My second reaction was wondering who was playing a joke on me. Deciding maybe it was just my lucky day, I responded with an enthusiastic "Yes!" And today, I found a package in my mailbox from the kind folks at Ribbon Ring.

Instead of hiding in a drawer, my colorful ribbons are now hanging next to my desk where I can easily grab one for a project. The package came with a 2" binder ring, (30) ribbon tags & (30) inventory dots.

The tags are approximately 1-1/2" wide x 2" tall with 1" wide openings. As you can see from the photo on the right - (2) American Crafts ribbons easily fit side by side. I put most of the ribbon I had in my drawer onto the Ribbon Ring and still have tags available.

Threading the ribbon onto the tags was very simple. Chester had fun "helping" me with it (ie, batting at the ribbon ends as I pulled them through). Thankfully he quickly lost interest and I think my ribbons are now safe. ;)

Rather than keeping all of the fun to Chester & me, I'm going to have a giveaway. I have a box sitting here filling up with scrapping goodies for one of my lucky readers. And it will include a Ribbon Ring starter kit courtesy of Ribbon Ring. Many thanks to MB!

For your chance to win, simply leave me a comment on this post between now and 9pm ET Sunday night. Best of luck!

ETA: We have a winner! :)

4/01/2008

Stamps & Ink Pads

I was asked today on a thread at Two Peas in a Bucket how I store my stamp ink pads. In keeping within the restraints of my small scrapping room, I try to keep my stash & tools to a minimum. So far, that means most of my stamps and all of my ink pads fit into one of the drawers in my Crop In Style unit.

I wasn't much of a stamper until I discovered acrylic stamps. I love being able to see where I'm placing the stamp and the thin profile. Much easier to store versus the larger mounted rubber stamps. The few rubber stamps I have are in a black bag by Generations. It sits on top of my other stamps since it's easy to move out of the way.

My stamp ink pads, acrylic stamp blocks, wet wipes (cleaning tip I found on Two Peas some time ago), and a few small packages of Studio G stamps from Michael's fill the right hand side of the drawer.

On the left under the rubber stamp bag are my acrylic stamps. I store a few of the Autumn Leaves stamps in their original packaging.

The rest are stored in CD cases that I labeled with my Dymo label maker.

Finally, my foam stamps are stored in Making Memories jars as mentioned in this post: Small Space Organization {Scrapping Desk}.

1/13/2008

Checking off the "To-Do" list

No scrapping today so far, but perhaps in a bit. I did finally get a few things off my to-do list. For starters, I bought a new keyboard & mouse. We have been having issues for several months now with the keyboard that came with the computer. It just didn't always work. After weeks of looking and 1 purchase & return - we realized it wasn't the keyboard but rather the port. I wanted a keyboard with a cord, but that is difficult to get these days. It seems everyone prefers wireless. So, here I am in grand form on the new wireless keyboard. For the most part, it seems to be working ok. It is occasionally not getting the signal which was one of my fears. Let's hope it manages to work 99% of the time because I've had it with shopping for these things.

While out keyboard shopping, I had holes drilled in my designing with 2007 calendar so I could put the pages in my binders. I prefer to store the previous calendars this way by category so I can easily reference them and pull out a page or two to use. They are so full of wonderful ideas and inspiration to help jolt me when I'm having a scrapper's block. :)

I did have one small misfortune. It seems the guy at the store wasn't very well trained in the process of drilling holes so the last 10 pages have torn holes. I used reinforcers to fix them, but I'm a bit irritated. Last year at least the first person admitted to not knowing so I took it elsewhere. Elsewhere being the store I went to today. Needless to say, I'll be more careful next year.

Finally, for a bit of humor....
I joined YouTube today (am I the last person to do so?) and uploaded a little video I made of Chester. ;) Cali makes a small cameo. Keep in mind, I filmed this with my regular Kodak digital camera so it's not high quality. Without further ado, I present Chester versus the Bag:


1/02/2008

Small Space Organization {Scrap Space Nook}

The "nook" is my nickname for the bit of "leftover" space between the closet and window in our scrapping/computer room (see bottom right corner of the floor plan). The house was new construction and owned by the builder before we bought it. While walking through, both Trent & I had the same thought when we saw this funny little space - it would be the perfect spot for the litter box and be a great spot for built-in shelving.

The first part was easy. The shelving, however, we didn't get around to until February 2005 - almost 2 years after we bought the house. The project took very little supplies. Some wood shelves and 1x4s from Lowes plus white glossy paint. Cutting and fitting the shelves was a bit more challenging because we quickly discovered how unsquare the walls were! The end result was worth the effort. Now we have a great spot to store some memorabilia, photo albums, and books. Although, I confess I do occasionally eye it for additional scrapbook supply storage. ;)

For decoration on the small wall between the nook and the closet, I selected 3 of my favorite postcards I've received and framed them in simple clip frames. The frames are 5x7 and I backed each postcard with black cardstock to help unify the images.

** For details on how to build the shelving, see my "how to" post here. **

12/30/2007

Small Space Organization {Crop In Style}

Probably my favorite new scrapping piece is my Crop In Style modular unit. It's a combination of four pieces - (2) Accessorizer cubes with added inserts and (2) 3-drawer Organizer cubes. I constructed a base for them to sit on using wood 2x4s and base molding. That idea I lifted from a user at Two Peas - abrandstetter.

The top left cube holds my patterned papers in a Cropper Hopper Vertical holder. I have them divided by theme and a few by category using the Cropper Hopper paper files and page planners. The latter are great when you want to organize papers with scraps or certain flat embellishments. For example, I use one of the page planners for my Disney papers and keep stickers in the smaller pocket.

Also in the top left cube are two magazine files - one for scrapbooking magazines I'm keeping for reference and one to hold blue plastic document holders I bought from the Target dollar spot. I keep chipboard shapes and 6x6 papers in the document holders. Next to them are the Pioneer Space Saver photo albums I mentioned in my Photo Organization post.

The top right cube holds my albums horizontally. I personally prefer to store them this way versus standing upright. Also it enables me to lay a few recent and/or in progress layouts on the top album until I'm ready to place them into their album.

The drawers along the bottom hold a variety of fun scrapbooking goodies. I added labels using the same font (Two Peas Old Type) that I used on the foam stamp jars. They are categorized as follows: alphas, ribbons & punches, tools, embellies, stamps, and misc.

The alphas drawer is as the name says - a drawer dedicated to alphabet embellishments [except stickers....I'll cover that in another post]. I split up all of my various alpha embellies (metals, plastics, chipboard, etc) by letter into large Cropper Hopper embellishment boxes. I labeled each box with the appropriate letter or symbol using some Making Memories alpha stickers from my stash. The boxes fit perfectly (with a few extra to spare) and still leave some space in the back for larger alpha and chipboard items that won't fix in the boxes. Another $$ saver tip here - I'm using index card cases by Better Office Products to house some of those larger items. These cases sell for $1.00 at CVS and are basically a freebie when I shop using my CVS ExtraCare Bucks.

Next to the alphas drawer is the embellies drawer. I keep those items separated with a Crop In Style Drawer Divider. I choose not to use the middle insert so I would have larger, rectangular spaces for some of the bulkier items. In the front you might notice the Cropper Hopper 3x3 Embellishment Bags. I recently bought a second package of those. They are very handy for storing little items such as brads and sequins.

The final drawer I'll share an inside photo of is the ribbons & punches drawer [pardon Cali's tail - she was curious ;)]. I don't own very many punches so it's easy to share the space with these two items. I keep them separated with an old paper file we had laying around collecting dust. I was about to add it to our donation pile when I realized how perfectly it divided this drawer.

12/28/2007

Small Space Organization {Scrapping Desk}

Each year after Christmas and with the New Year on the horizon, I tend to get into a spring cleaning mood a bit early. This year I thought I would share some of the scrap room organization ideas I've incorporated over the past year. I'm going to break it up into multiple posts over the next few days. Hopefully, you'll find a bit of inspiration. :) Click on any of the images for a better view.

The room where I "play" is the smallest bedroom in our house - 10 feet by 10 feet - but carries a LOT of responsibility. The computer area, my scrap space, and cats' litter box all squeeze in. Until about 3 months ago, the treadmill lived in there too. Yup, chaos! LOL :D The floor plan to the right will give you an idea of how tight things are.

My scrap desk is located opposite the door. I like this spot where I can see the tv and see the furkids coming and going. Sometimes they just lay in the hallway outside the door and watch me or nap. ;) LOL The desk itself was the first official "scrapping" furniture purchase I made when we bought the house. I got it at AC Moore for $50 using a 50% off coupon. That's just the start of my "deals" [remember, I'm a big coupon-er and money saver ;)] in this space.

The light fixture next to the desk was a hand-me-down from a friend who was moving. So glad I scooped that up as it gives me excellent lighting when working on my projects.

The wallboard and shelving are from Pottery Barn. It's a discontinued item called "Wayne Modular." I was eyeing it in their catalogs and online late last year, but it was out of my price range (the board alone was over $100!). In January, they slashed the prices by up to 90% so I managed to get 2 boards, 2 shelves, 5 ledges, and 1 pin board for about $120 (original price about $600!). The other board hangs over our computer desk, but that will have to wait for another post as this one is already getting long.

On the ledges over the desk, I keep a variety of embellishments and tools in Making Memories storage jars. The top ledge has the large size jars with foam stamps. I've added a simple MM metal rimmed vellum tag to each and printed the stamp types in Two Peas Old Type font.

The ledge below it has a collection of 12 of the smaller MM jars with buttons, tabs, flowers, etc. The jars are flanked by two metal tin containers I picked up at the Target dollar spot in the spring. The one on the left holds my MM paints and the one on right right I use for miscellaneous loose embellishments I'm currently using.

11/11/2007

Photo Organization

Digital Photo & Print Organization
Since purchasing my first digital camera in early 2002, organizing photos has become a bigger challenge. With 35mm film, I felt as though I was limited by the number of exposures on the roll and would take a photo cautiously - not wanting to run out of film and miss something. These days, I have the opposite problem - too many photos! I keep a 1GB card in my digital camera and snap away. On the trip to Disney, between my camera and the photo CD we purchased from Disney, I have 365 photos!! Enough to make anyone's head spin.

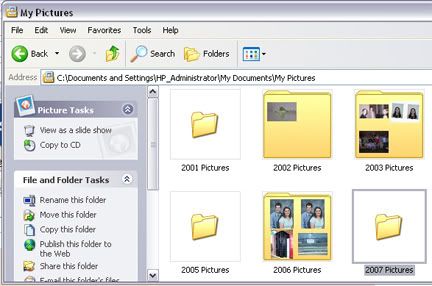
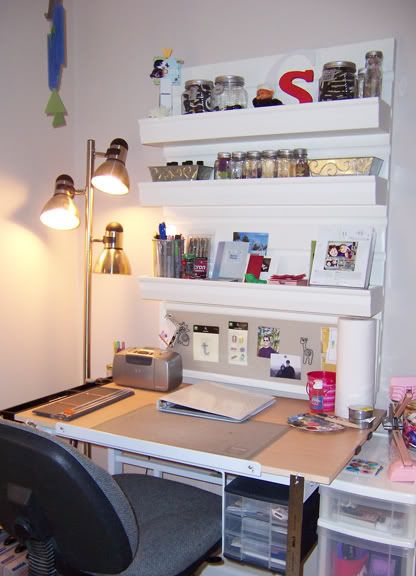
On my computer, I simply store all my photos in the My Pictures folder. Inside are folders for each year. Then I have folders for each event within the annual folders labeled by date and event. For example, my Disney photos are in a folder with the title "Nov - Disney Trip."

Having over 300 photos for one event can be a little much. For starters, it eats up more of the hard drive space, but also can make it difficult to find a specific photo I'm looking for. After transferring all photos from the camera card to the hard drive, I start flipping through them using the Windows Picture Viewer. As I find a photo that is "not good" [for me, this ranges from blurry to "why did I even take that?" ;) LOL ], I delete it. If I hesitate, I'll keep it for the time being.

Recently I added a folder to my 2007 Pictures titled "-to be ordered-" where I can drop copies of images I want to get printed so when I'm ready for prints, I don't have to search multiple folders and I don't need to worry about accidentally reordering a photo I've already had printed. (I jump between developing companies depending on which has the best prices at the time which can make a double order easy to do if I'm not paying attention.) After I've uploaded the images to a photo developing website, I delete those images from the "-to be ordered-" folder.

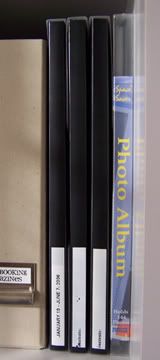
Finally, I back-up all of my digital images in two places - my Maxtor external hard drive and on annual CDs. Although I think I might start using DVDs as they have a greater capacity. All of my prints, are stored in Pioneer Space Saver Photo Albums. I love the slim design of these albums and as they are more for my reference and archiving than for show - it's not important to me to have "pretty" photo albums. I purchase the 144 pocket option online from Archival USA and add date labels on the spine using my label maker.


Older Photo Organization
I have lots of prints from both the "old" film days and those that were given to me by whomever took the photos. I store these separate from the digital print albums. Why? Well, I use the Pioneer albums as an index of my digital photos. A hard copy way to thumb through and see what I might like to work with when scrapbooking or just looking for a photo to share. I don't want to mix these with my film prints. I store my film prints in 
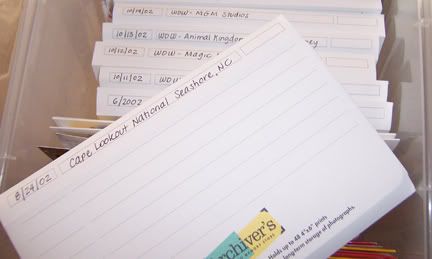
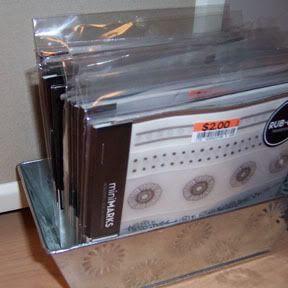
Rubbermaid Photo & Media Storage Boxes. Any groupings of a particular event, are sorted into photo envelopes from Archiver's. I like using these envelopes because of their archival quality and lined outside with room to list the contents. They keep the boxes orderly and help me locate an event quickly.

11/01/2007

My New Fav Toy

Purely a fluff post. ;) I wanted to show off the newest and current favorite item in my scrap area.

I've looked at this Pottery Barn Kids art caddy from a distance for a year or two. Finally decided to go ahead and treat myself while shopping with my mom in mid-Oct. It was well worth the $45. I love the large size, sturdy construction and how it helps me keep more of my supplies close at hand. Of course, as you can see, I still have a bit of empty space to fill. Good thing some new Archiver's coupons arrived in the mail today.

[ETA: The PBK art caddy is available in store only at this time.]

2ps blog challenge:
What is a class you would love to attend/see at your LSS?
Not sure what class I would like to see offered, but I would love to take the new Hip Household Organizer class Archiver's is offering. Looks like a fun and useful project for me. Of course, as far as the November class schedule - it's only offered when I'm unable to attend. Hoping this class will available in December as well.