If you are interested in using digital templates for scrapbooking, but haven't been so sure how to go about doing it - keep reading. Following are steps for using the free template I shared yesterday. There are probably a variety of different ways to do this, but this is mine:
STEP 1
Open the template. Rename using "save as" to prevent overwriting the template.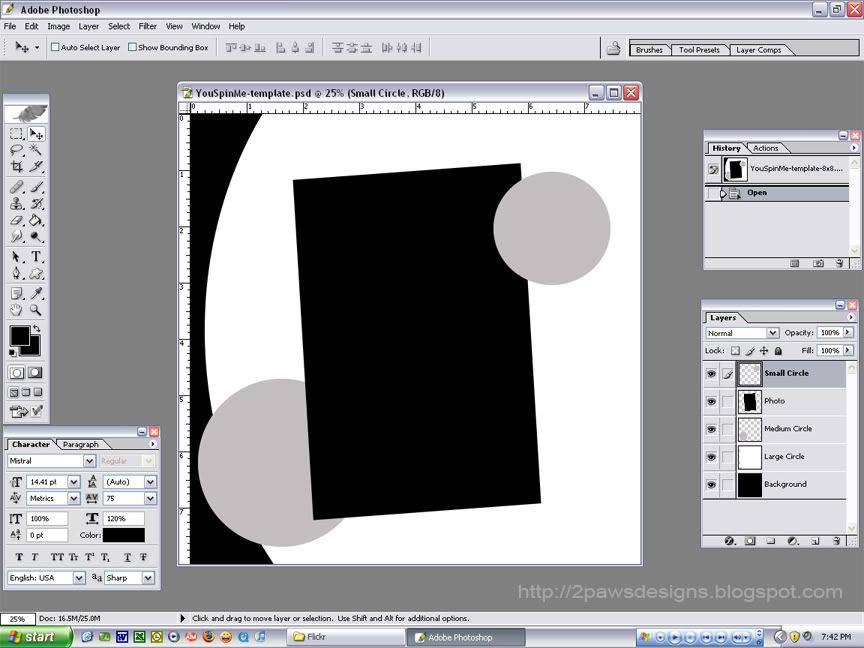
STEP 2
Open the photo you want to use. Select the move tool. Then drop and drag your photo to the template.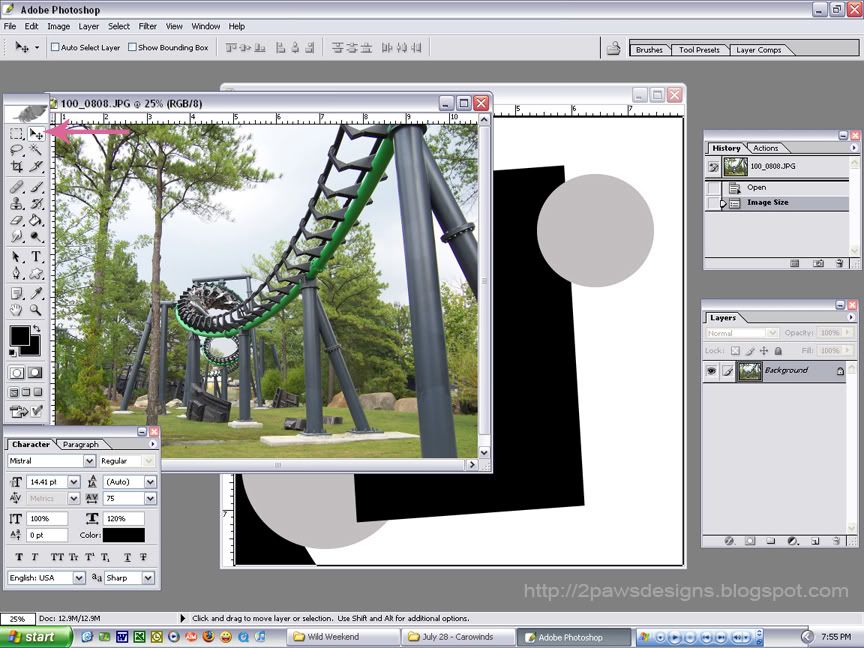
STEP 3
Make sure the new layer with your photo sits directly above the "Photo" layer in the template. If not, grab the layer and move it down.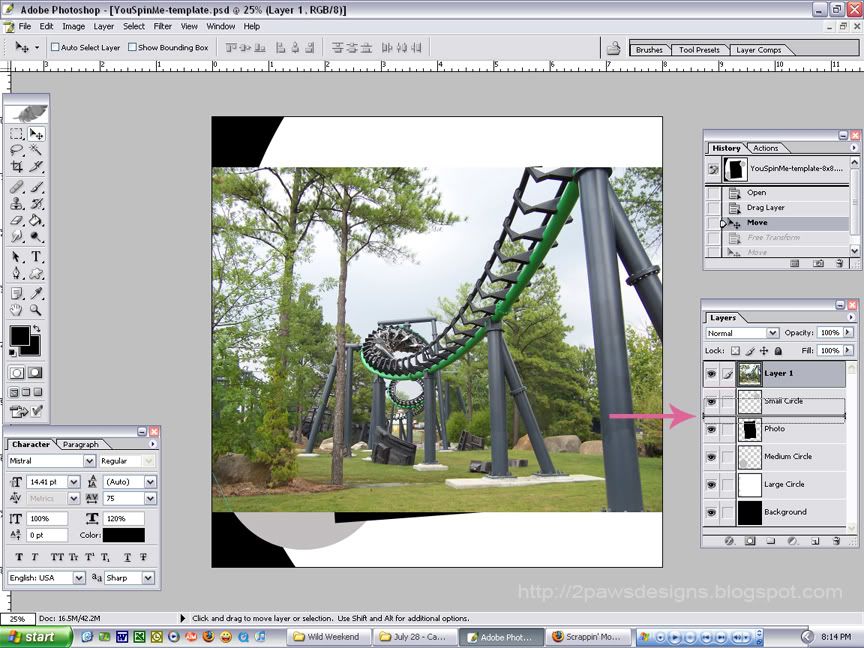
STEP 4
Use the Transform tools to edit your photo placement. I selected rotate to adjust the photo rotation to the template.
STEP 5
While the Transform tools are active, the image will be outlined. Grab any of the nodes to adjust. Move your mouse onto the image to grab and move it into place. Hit enter to accept the changes once you have it where you want it.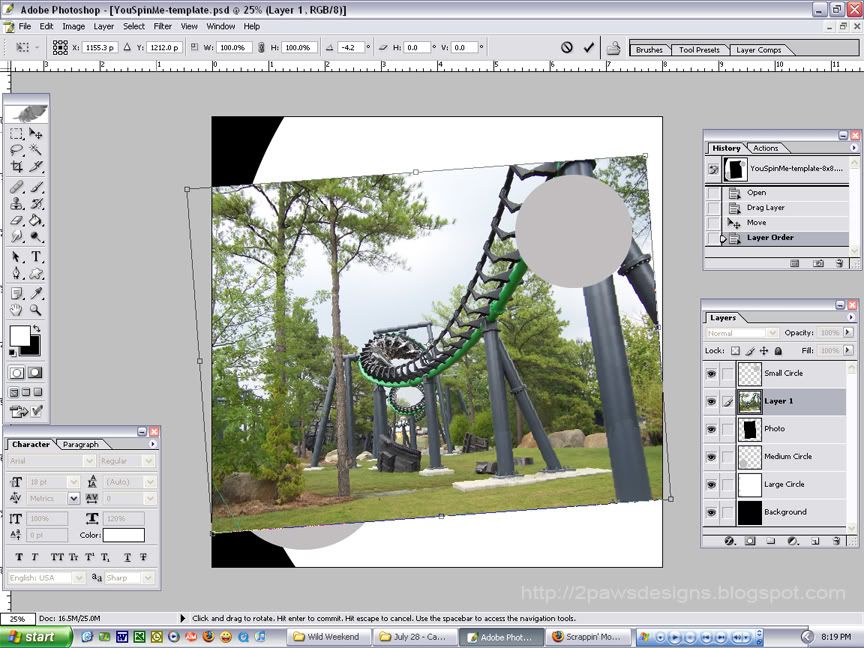
STEP 6
Mask the "Photo" layer by holding down the control key and typing G. Now only the image directly over the mask is visible. If the photo doesn't exactly align where you want it, use the move tool to shift it around. Or return to the Transform tools to rotate, stretch, etc.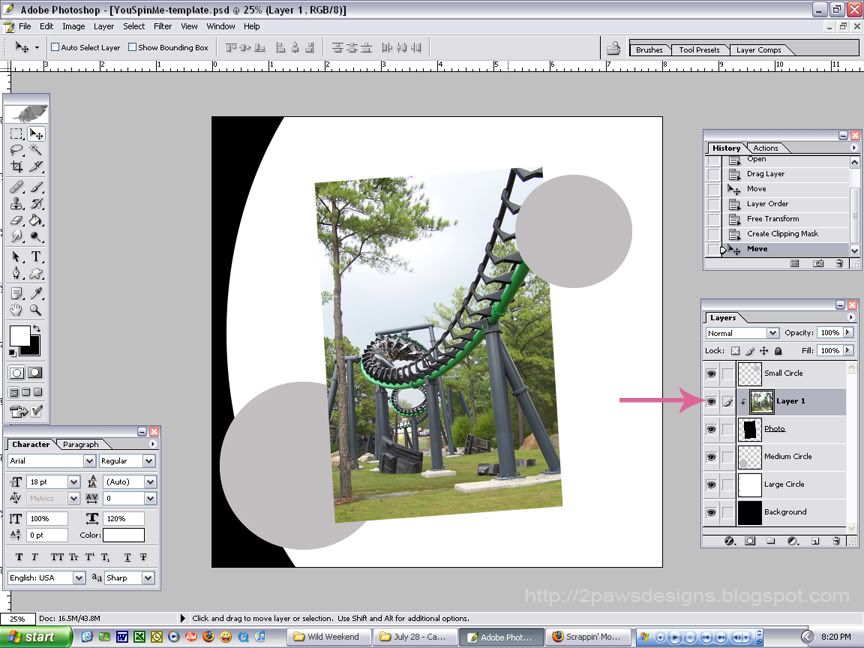
STEP 7
Repeat these steps for the other layers. Play around with shadows to give depth to the page.
RESULT
Remember you can always make a template your "own." I didn't want to fully recreate my You Spin Me layout which inspired the template. To switch thing up for the Borg Assimilator layout, I used 1 large photo instead of 2 smaller ones and replaced the lower left circle with a grouping of word stickers. Finally, I added journaling using the same technique I explained in my Shaped Text post.
Supplies: Grass Stain patterned paper and word stickers from Wild Weekend kit at Peppermint Creative; scan of Carowinds map; Bajoran and Come Unto Me fonts; my You Spin Me template
6/21/2008
Digital Template Tutorial
Subscribe to:
Post Comments (Atom)


LOVE your page, and will check our your template post in a sec:)
ReplyDelete