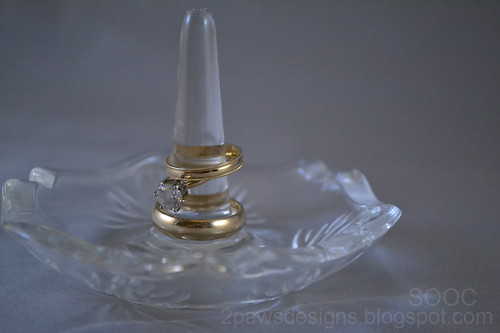
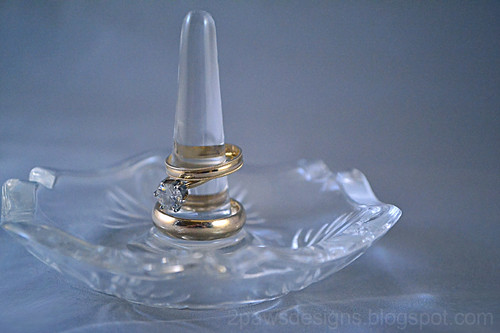
I went round and round on my edit this week. I think I set myself up for a challenge when I chose to use a photo with so little color. Thank goodness for the snapshots option in Photoshop's History window. Every change or two, I made a snapshot. Then I went back and forth between them seeing what I liked and didn't.
I meant to take notes of the steps - part of my reason for doing the snapshots was to make that easier. Then I forgot to check before I closed the window and, of course, this would be one of those times where I did not save a .psd file. That said, to the best of my memory here's what I did ...
- Adjusted the levels. Setting the white and black points, shifting the input and output until I liked what I saw.
- I used the clone tool to clean up around the top of the ring holder. It looked dusty in the original photo. It wasn't - just the way the light was bouncing off the top.
- Created new layer for high filter. Lowered the layer's opacity to 75%.
- New adjustment layer - curves. Adjusted settings for shadows, midtones, highlights. (My version of PS does not have the awesome graph in the background - just a grid - so jealous of that! I think it would make my process a bit different.)
- New adjustment layer - brightness/contrast. Adjusted slightly.
- New adjustment layer - hue/saturation. Adjusted saturation only.
- New fill layer - gradient. Changed the angle and scale. Layer mode to soft light.
- New fill layer - solid color. I used a very light yellow and reduced the layer opacity.
Join in the fun with Forever'n Ever'n Always Photography and Ramblings and Photos:


I think your edit is nice - there is still a lot of blue in the photo, but maybe that's what you're going for. Nice work. :)
ReplyDeleteVery subtle, but much more clarity. :D
ReplyDeletei like the subtle edit!
ReplyDeleteblessings jill
The subtle editing is all that was needed. Nice job Sarah.
ReplyDeleteWow, Sarah! That picture just came alive!
ReplyDeleteYes, your edits made your photo glow! Lovely, nicely done.
ReplyDelete