Showing posts with label how to. Show all posts

6/12/2012

"Dad" card

Last year I made hybrid cards for our fathers for Father's Day:


I started with a simple 5.5" x 8" rectangle and added a 5" x 7.5" mask in the center. This allowed me to easily layer two papers to create the background. I printed these onto white cardstock, cut to size and scored it at the 4" line to create the fold.


Next, I opened a pennant flag element from the Give Thanks kit and added "DAD" using brushes. I printed these onto white cardstock as well, cut out and then adhered to the cards with adhesive backed foam to give the design a bit of dimension.


Simple as that and they each had a beautiful handmade card.

Are you making cards this year? I'd love to see. Share a link to the post or image in the comments section. :)

Supplies: Give Thanks & Happy Camper kits by Sara Schmutz; Digi Essentials 8 by Karla Dudley; white cardstock; adhesive backed foam.

3/28/2012

How To: Built-in Shelving

After being asked on my post about the Half Bath Shelving how I made the built-in shelves, I thought a "how to" post might be a good idea. The method I used in the bathroom and in Dylan's room, is very straight forward and simple. Keep in mind, in both cases I ran my shelves from wall to wall and this tutorial follows that design.

Supplies
  • wood shelving - I used 10" deep Eastern White Pine
  • 1x2 wood - these are for the supports. I used Eastern White Pine that matched the shelf piece.
  • 1x3 wood - this is for the front of the shelves. Knowing I was staining the wood in the bathroom, I did buy 2 smaller pieces here that had a nicer finish. I wanted to be sure they were nice, straight smooth pieces since they would be the most visible. 
  • drill
  • level
  • screwdriver
  • screws and wall anchors - I used some we had on hand. Keep in mind your wood thickness and wall type when making a selection.
  • stud finder
  • hammer
  • nails
  • nail setter
  • wood filler
  • stain (I used Minwax Red Mahogany in the bathroom and stained before installation) or paint

Start by cutting a piece from the 1x2 and shelving boards that match the width of your space. Next, measure the depth of your 1x2 board. Then measure the depth of your shelf board. Now subtract the depth of the 1x2 from the depth of the shelf. This will give you the length of the two side pieces to cut from the 1x2 board. Cut those pieces (you will want your shelf to fit cleanly on top of these pieces - see illustration 2).

Illustration 1: 1x2 shelf support pieces
Attach the longer 1x2 support piece to the back wall at height desired using screws at each end. Start by screwing one end loosely, then place a level on the board to align other end. Secure screw at opposite end and then tighten first screw completely. Add additional screws in the center as needed. For the bathroom, I added one extra screw directly in the center. Use a stud finder to help locate studs to screw into or use wall anchors. In my case, I had studs at each corner and one at the center.

Next, place the side supports so one end butts the back support. Add a screw at this end, but, as with the back piece, don't tighten completely. Use a level to align the board and then screw in the other end. Tighten both screws. (Tip: If you predetermine you screw locations, you can mark and predrill holes on one board then use that as a template for the opposite side. Just remember to flip the second piece so the holes are mirrored. Then you will quickly and easily have all your screws in the same place without extra measuring.)

Illustration 2: Shelf should fit cleanly over 1x2 support pieces
Measure the back wall again over the back support. Then pull a measurement from wall to wall at the front of the side supports. These may or may not be the same depending how squarely your home was built. Mine was slightly off. Cut your shelf board based on these measurements. Then place the shelf board on top of the support pieces. Use a small drill bit to start holes along the back and side edges. Then hammer nails into each of these holes to attach the shelf. Sink the nails slightly below the shelf top using a nail setter.

Illustration 3: Add front piece making sure to align the top with the shelf.
Add the front piece to the shelf and supports already in place. The top of the front piece should align with the top of the shelf. Again, use a drill to start small holes to nail into and recess each nail slightly using a nail setter.

The shelf is now fully constructed! Add a bit of wood filler to each of the nail holes and follow directions for drying time. Sand lightly and touch up with stain (or paint). Allow to dry and enjoy!

3/18/2011

Shoot and Edit: Yellow edit

I had a lot of fun playing with this little ducky.  I love his worn look and am really happy with how the edit came out.

Here are my steps ...
  • Levels - set white and black points.  Adjusted input and output levels until they "looked" right.
  • Duplicated background layer and used high pass filter.
  • New adjustment layer - curves.  
  • Merged all layers.
  • Duplicated background layer and applied Gaussian Blur.
  • New adjustment layer - levels.  Set white and black points.  Tweaked RGB.
  • New adjustment layer - brightness/contrast.
  • New adjustment layer - color balance.
  • Merged all layers.

Then I followed Ashley's instructions this week for adding sun flare with a few tweaks...

  • Created 3 duplicate layers of the background layer and renamed each starting from the bottom: lens flare, lighten and contrast.
  • Selected the contrast layer.  Changed the blending mode to soft light and lowered opacity to 70%.
  • Selected the lighten layer.  Changed the blending mode to screen and lowered opacity to 50%.
  • Selected the lens flare layer.  Filter>Render>Lens Flare.  I tried the different types of lens flare options and ended up with 105mm Prime at 100%.  I lowered the layer opacity to 75%.
  • Selected the lighten layer.  Added a new adjustment layer - levels.  Adjusted the input and output levels slightly.  Lowered the layer opacity to 78%.
  • Selected the contrast layer.  Added a new adjustment layer - photo filter.  Applied warming filter 81 at 25% density.  Checked preserve luminosity.
  • Added a solid fill layer using color #F4F6DF.  Blending mode soft light.  Layer opacity 9%.
  • Duplicated the solid fill layer.  Changed the blending mode to screen and lowered the layer opacity to 4%.
  • Merged all layers.

    Finally I followed Ashley's steps from last week regarding sharpening to improve my image for the web.  Here's the final edit:


    Join in the fun with Jill Samter Photography and Ramblings and Photos:

    8/11/2010

    card: happy birthday

    Birthday card I made for my sister-in-law:


    The design is simple.  I started with a premade card from a purchased package.  I cut the patterned paper a quarter inch less in width and half an inch less in height than the size of the folded card. Stamped the sentiment on the blue cardstock and cut it out.  Using a punch, I rounded the two left hand corners.  Then I adhered it to the patterned paper.  I used an edge scraper to rough the edges and give it a little texture.  Finally, I adhered the papers to the card.

    Supplies: Die Cuts with a View card; American Crafts patterned paper; Making Memories edge scraper; miscellaneous blue cardstock; EK Success corner rounder punch; Heidi Swapp stamp; StazOn ink.

    4/23/2010

    Handprint Thank You Notes

    It's never too young to teach a child the importance of a thank you note, right? That's why I decided to have Dylan "help" me with the notes I wrote last month to thank family for the gifts he received following his baptism. I placed Dylan in his high chair, got out a bottle of acrylic paint, squirted some onto a paper plate, helped Dylan stick his hand into it and and then we made a handprint on a piece of white cardstock. Sounds easy enough but for my child who will normally touch anything (and put it in his mouth!), he resisted putting his hand into the paint. It took a bit of effort and a good grip on his hand so we could make the print & cleanup before the hand reached the mouth!

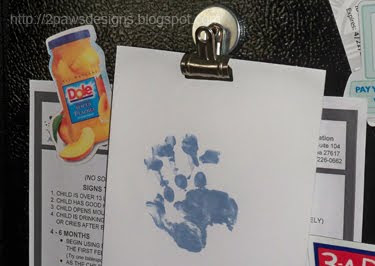
    After we finished, I hung the print up on the fridge while it dried. Dylan seemed to like this part. I carried him over to see and he had a big grin on his face while reaching out trying to grab the paper. ;)


    Once it was fully dried, I scanned it in. Added "thank you" and printed out copies onto several sheets of white cardstock. Roughed the edges with an edge scraper. Glued onto a sheet of 4x6 black cardstock. And here is the end result:


    Simple & cute thank you notes.

    Supplies: Making Memories cardstock, paint, edge scraper; 2Peas Sandbox font.

    Bookmark and Share