1/31/2012

Heart Suncatcher

One of Dylan's neighborhood friends spent a couple of hours with us on Friday morning. I decided to try a craft project with the boys using the same method I did last year for a shamrock and pumpkin. I cut heart shapes from a piece of red scrapbook paper and placed it on a sheet of clear contact paper. Gave them a pile of white, pink & red tissue paper pieces to stick to their heart. Then sealed it up with another sheet of contact paper and trimmed it. Here's Dylan's finished heart:


Supplies: red scrapbook paper; clear contact paper; white, pink & red tissue paper.

1/30/2012

Canvas Wall Hung Organizer

One of my friends asked me to make a canvas wall hung organizer for her toddler son's room. She liked one from The Land of Nod, but wanted it without the applique. I sketched up a design based on that image and then met her a few days later at the fabric store to buy supplies. Here's the result:

The organizer.

Close-up of one of the pockets.
Grommets at the top for hanging.
It's 14" wide by 40" long. Each pocket is 12" tall and 2" deep at the top - plenty of room to store books, magazines, toys, etc. The top has a pair of grommeted holes for hanging. Hopefully they'll be able to enjoy it for a long time to come!

Supplies: canvas; thread; bias tape; 1/4" grommets.

1/27/2012

Friday Freebie: Destination

Living close to the airport and directly in the flight path, Dylan has had a fascination with planes since his early days. The photos on this page were from our first visit to the General Aviation Terminal for lunch and airplane viewing with friends:


Supplies: Audrey Neal's Flight Path kit ("destination" banner recolored); Karla Dudley's Digi Essentials 2; Myriad Pro & Verdana fonts.

I ended up creating a template while working on this page and thought it would be a good way to restart the Friday Freebie posts for the new year! The template is12x12 and features 9 layers including photo & paper masks and journaling. It's free for personal use only.

Click here to download the Destination template

Enjoy!

Have you missed one of my previous digital freebies? Click HERE to find them. And, don't forget to subscribe to my feeds so you won't miss future freebies!

1/26/2012

Infant Car Seat Cover

Another winter baby expected in our playgroup, meant another car seat cover. This time I went with a fun polka dot fabric:


I used the same soft yellow flannel for the inside:


As with the infant car seat cover I made last fall, I again referred to a couple of online tutorials - Sutton Grace: Infant Seat Canopy Cover and Make it Do: Baby Car Seat Cover Tutorial.

Supplies: 1-1/3 yard of each fabric; thread; velcro.

1/25/2012

New Fort

Two years ago, we bought a Step2 Kangaroo Climber for Dylan from Craigslist. We've frequently referred to it as his "fort." He's loved it, but also outgrown it. Too tall for the doorway (occasionally forgetting to duck!) and had mastered climbing up & over both sides - it was time for something bigger.

First time down the slide. March 2010
Last week searching Craigslist again, I found a Woodland Climber for a good price. I wasn't certain it would fit in our CR-V, but, thankfully, a friend offered to help and Sunday afternoon we brought it home. Dylan was ecstatic about his "new fort" even though it was in a pile of pieces on our patio!

Monday afternoon, with the rain subsided, we headed outside to clean it off and put it together. Oh, yes, there was still a good bit of sogginess and mud in our backyard, and it was chilly, but that didn't bother him at all. He was so excited to help me clean each piece and assemble it. He was even pointing out which piece was next (without directions!) and telling me what to do. So funny!

Helping clean & assemble the new climber
Right as we finished, the new owner of the Kangaroo Climber arrived. I wasn't sure how Dylan was going to react, but he did great. He climbed on it again while I showed it to her. Then helped us take it apart and carry pieces to the car. He even said "goodbye" as it left to create happy memories for it's 3rd family. A bit bittersweet for me, I'll admit, as it's one more sign my little boy is growing up! But I can't deny the happiness on this little face after climbing up into his new "big" fort for the first time:

A very happy big boy. :)

1/24/2012

Movie Day

For a playgroup gathering last summer, we let the kids watch Cars:


Moments after this photo was taken (and the movie barely on) most of them had moved on to the toys.  :)

Supplies: Design House Digital's Digital Scrapbooking Day Blog Hop 2011 collaboration kit; Miss Mint's Movie Night kit; Robyn Meierotto's Kraft FunDay elements; Sara Schmutz's Nursery Rhymes elements; Just the Way You Are font; photo - Totally Rad's Bitchin' B&W and The CoffeeShop Blog's Vintage actions.

1/23/2012

Tea Wallet

One of my good friends went out of her way to help me yesterday and I wanted to do something to say thanks. Knowing her love of tea and how much she travels for work, I thought a tea wallet could be handy to stash her favorite tea in her purse or briefcase.

Closed
Interior with pockets to hold several tea packets
Exterior
I followed this tutorial at Is It Naptime Yet? blog. The only change I made was to use a hair elastic instead of a fabric or ribbon loop for the button closure.

Supplies: fabrics (Robert Kaufman & Moda); thread; elastic; American Crafts button.

1/20/2012

Candy

On a cool February day last year, Dylan & I met up with Allison & C at Crabtree Valley Mall. The highlight was visiting the candy store to see the "world's largest gummi bears."


Supplies: Erica Coombs's Jan Swatch Challenge Freebie patterned papers; Spencer Nugent's Sketchy Elements vol. 1; Michelle Underwood's Posie Add On (tape recolored); Jen Allyson's Real Simple: Polaroid Frames; Rhonna Farrer's Celebration kit; Stamp Act Jumbled & Just the Way You Are fonts.

1/17/2012

Valentine Envelope Chair Backers

Inspired by cute Valentine's envelope chair backers at Pottery Barn Kids, I pulled together a few supplies to make a pair for Dylan's Ikea LÄTT table & chairs set. I changed the design of mine slightly for a more "masculine" look by leaving off the scallops and replacing the large heart with a button.


Supplies
  • white felt (I used a packaged 36" x 36" sheet; smaller sheets would also work)
  • white & red thread
  • velcro
  • red embroidery floss
  • 2 red buttons

Start by measuring the chairs you want to place the envelopes on to determine your envelope size. I made my envelopes 11" wide by 8" high. Since I opted not to add scallops, I was able to cut each envelope as one large piece. With help from my assistant, I drew out the design using fabric marker and traced one of our china dinner plates (Pottery Barn, fittingly!) to create the curve at the opening end:


After cutting out the envelope shapes, I measured the top of the chairs to determine the size for the straps. To do this, use a tape measure to go all the way around the top of the chair where the envelope will attach - remember to overlap for where the velcro will affix. My straps were 9" long by 1.5" wide.

I folded my large cut piece into the envelope shape and held it to the chairs to determine strap placement. Knowing I wanted the straps at the outermost point and near the top, I decided on 1" in on each side and 1/2" down. Pin straps at the desired locations and sew onto the envelope piece:


Add a strip of velcro to the top end of each strap. Add the second piece on the opposite end & opposite side to secure to chair later. I literally took the envelope to the chair again after sewing on the first piece and used my fabric marker to note the location for the second piece ensuring a good, snug fit:


Fold the front up, pin and sew along both sides and the bottom at 1/4" in from edge:


Sew along the two angled edges of the flap, also at 1/4" in, to add definition, if desired. Next, hand stitch the red embroidery stitches just inside the lines you sewed by machine - all three sides of the flap and the sides and bottom of the envelope. I used DMC floss #321.


Finally, add button holes to the flaps. I used my sewing machine's button hole option to do this (tip: use fusible interfacing on the backside of the flap to stiffen and make this process easier). Hand stitch a red button on each envelope to create closure.


Finally, place on chairs and enjoy! If you create your own, let me know - I'd love to see. :)


Tip Junkie handmade projects

1/16/2012

Dec 4th: The Tree

The day of the tree ...


Supplies: Simply Tiffany Studios Holiday Edition Template Album; Robyn Meierotto's Cupcake patterned papers & Dated stamps; Sara Schmutz's Jolly kit; Tweet, Tweet collaboration kit from Oscraps; Deena Rutter's Jolly Holiday elements; Just the Way You Are font.

1/13/2012

Little Fairies Stroller Blanket

One of my projects for this week was sewing a stroller blanket to list in my Etsy shop. I've accumulated quite the stash of fabrics in the last year and need to work through some!


This pink flannel called "Little Fairies" was one of those fabrics. Such a cute print. I paired it with a very soft white minky dot fabric.


The overall blanket size is 28" x 30" - thus the "stroller blanket" name as it's just the right size for use in the stroller, car seat, tummy time or even sleeping. It's close in size to Dylan's Cars blanket (also flannel/minky dot) that he's slept with constantly for the last year.

Supplies: flannel; minky dot; thread; ribbon tag.

1/12/2012

Reading

Dylan & my mom reading one of his favorite books - I Spy Little Wheels.


Supplies: Jen Papadimitriou's January Blueprint Challenge template; Sara Schmutz's Strawberry Patch labels, Bicycle Ride freebie & Recollect patterned papers; Karen Funk's Claire patterned papers; Karla Dudley's Sunkissed patterned papers; Shannon Hegarty's Lighthearted patterned papers; Ellie Lash's Detour patterned papers; Robyn Meierotto's Fashionable Fall patterned papers; Anne Langpap's Citrus Freeze kit; Janda Everyday Casual font.

1/10/2012

Woody

Dylan has become quite the fan of Buzz and Woody since our Toy Story Halloween. I wanted to give him a Woody toy that was a gift from me to Trent when we were dating. Somewhere along the way it disappeared. We truly had no idea what had become of it. Luckily, when I was up in the attic putting away Christmas decorations last week, I opened another box purely by chance and found Woody inside. Dylan was so excited when we gave it to him. Woody's had quite a few new adventures since.


This week's 4 Play challenge and the monthly scraplift challenge at Design House Digital inspired me to get Woody's story scrapped.

Supplies: Celeste Knight's Menagerie patterned papers; Dana Zarling's Lakeside Worn digital papers; Karla Dudley's Crazy In Love elements; Kate Teague's Handy Frames Neutrals; Times Roman font.

1/09/2012

5k Training

With my cute little workout buddy strapped in the jogger, I hit the pavement last week starting my training for a 5k in April.


Supplies: Sara Schmutz's Star Spangled paper pack 1; Audrey Neal's Pinned; Robyn Meierotto's Kraft FunDay alphas; Jen Allyson's Nostalgia 2 Labels; Janda Everyday Casual and Another Typewriter fonts

1/06/2012

December Daily - 7th

Slowly getting back into creating pages for our December Daily album (albeit out of order). The highlight of December 7th was getting together with our playgroup - we decorated gingerbread men and played.


Supplies: Simply Tiffany Studios Holiday Edition Template Album; Robyn Meierotto's Fun & Festive papers; Sara Schmutz's Jolly kit; Teletype and Just the Way You Are fonts.

1/05/2012

International Space Station

Thanks to a tweets from Katie at Discovering the Southern Part of Heaven (@southrnptheaven) and the Morehead Planetarium (@moreheadplanet) yesterday, I learned that the International Space Station would be passing overhead and visible just before 6pm last night. Dylan and I bundled up and headed out in the cold with our cameras to watch the event.

Here are my sooc shots (minus a little cropping on each - lots of sky!). The tiny white dot is the space station.

ISO 3200, ss 1/8, f5.6

Dylan's sooc photo of the moon using his Little Tikes digital camera (I confess, he was so cute putting the strap over his neck and playing photographer just like mommy!) ...

ISO 60, ss 1/5, f2.8

1/04/2012

Shoot and Edit: Best of 2011 sooc

Looking back over my SOOC shots for the Shoot and Edit challenge last year, I picked 16 of my favorites:


Several of them were from the last few months - I definitely feel more confident using my DSLR and think the photos show the improvement. My personal favorite SOOC shot of the year - the sun setting over Lake Crabtree:

Week 30: Sunset SOOC
ISO 100, ss 1/1000, f5.6

Thanks to Jill Samter and Ashley Sisk for hosting the challenge! I enjoyed playing along and learning both more about my camera and about editing.

1/03/2012

Mr. Potato Head Parts Bag

One of Dylan's gifts from Santa this year was a Mr. Potato Head. Given he only has the basic kit so all the pieces fit inside the potato, but the "trunk" never seems to want to stay closed. When I saw an idea on Pinterest to make a burlap bag to store Mr. Potato Head and his parts, I knew I needed to make one.


Lucky for me, I had burlap on hand bought for another project before Christmas that never came to. It then took on life as a tree skirt (we had forgotten we needed a new one until the tree was up. I really want to make one vs buying another so I wanted an easy cheap fix this year - duct tape & burlap cover a tree stand nicely!). Now that our tree is down, and with a goal to make a new tree skirt by next Christmas, I was willing to cut up the burlap for this new project.


In a short time with Dylan working nearby at his craft table on a Play-doh project, I sewed up the bag using the burlap and leftover ribbon from his toddler belt. I later added the felt Mr. Potato Head during his nap time. Now all the pieces store nicely and we can toss the bag into his toy box.


Supplies: burlap; thread; 5/8" ribbon; felt; buttons (eyes); Aleene's Tacky Glue.

1/02/2012

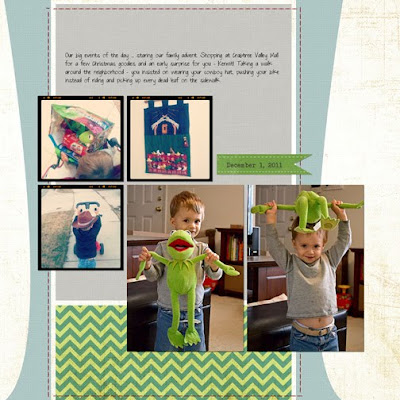
December Daily 2011

I really love the December Daily album I created last year. It ran from the start of our Christmas festivities on Nov 30th (visiting Santa) to Jan 1st (final celebration with family). The entire album was digital and I had it printed as a Shutterfly book. This year, my goal was to do the same.

Here are the first three pages from my 2011 album starting again on Nov 30th with our visit to Santa ...


With other things (making Christmas gifts, working on Dylan's stocking, etc) eating up my time during the month, I pushed off further work on the pages until after Christmas. Now I haven't decided when I will complete the album. At the moment, the final week of December is still just a bit too raw. Losing Chester on Christmas Eve took the magic out of finishing this album. I need some time to decide how to properly mark the day and yet remember him too. Then hopefully I can add the 2011 book to our collection.

Supplies: Simply Tiffany Studios Holiday Edition Template Album; Sara Schmutz's Jolly kit; Deena Rutter's Jolly Holiday kit; Robyn Meierotto's Fun & Festive elements; Audrey Neal's Dotted Dates.