1/31/2011

Shoot and Edit: Red

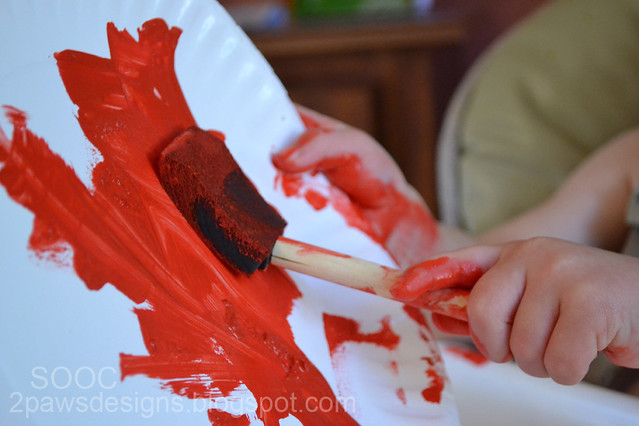
Saturday I pulled out the paints so we could make a handprint heart plaque (yes, I'm officially addicted to handprint & footprint art while Dylan is still small).  Dylan was sooo excited and very patient with Trent & I as we helped him.  Afterward, I handed him the paper plate I had squirted red paint on and the foam brush so he could "free paint."  He had a blast.  And I got several shots.  My favorite for the Shoot and Edit red challenge is this one:

ISO 3200, ss 1/100, f5.3
Join in the fun with Forever'n Ever'n Always Photography and Ramblings and Photos:

1/28/2011

Shoot and Edit: Good Night edit

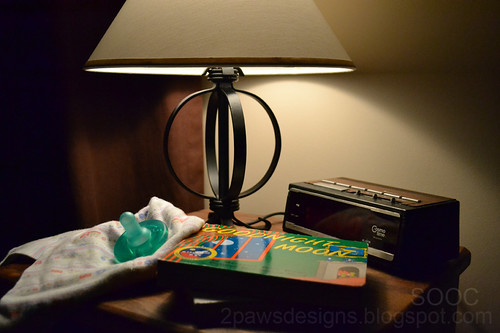
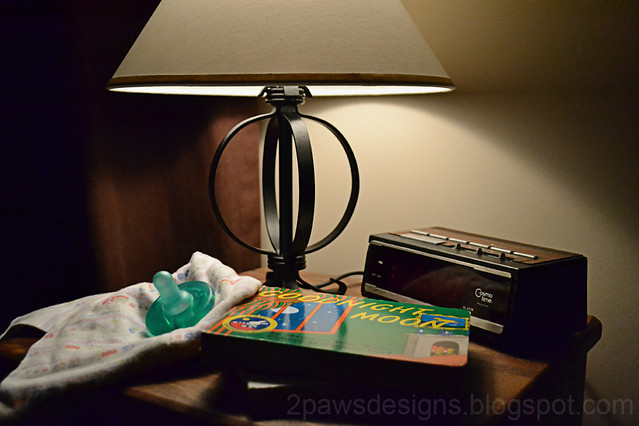
When I went to edit my Good Night photo, I was momentarily stumped.  It was one of my first in manual mode (trying hard to learn and become more comfortable with that over auto) and truthfully, I liked the softness.  That said, I forged on ahead and started working on adjustments beginning with the duplicate layer, high pass filter that Ashley has mentioned in the previous weeks.  From there, I started following along with the first half of this week's tutorial.

I added a new adjustment layer for curves and bumped up the lightness ever so slightly.  Just enough that the texture in the lamp shade begins to show.  Added an adjustment layer for hue/saturation (hue: 0; saturation: -10; lightness: -3).  Merged all layers.  Then used the noise filter, median.  This was another setting I barely tweaked - 4 pixels - but it sharpened it up enough I think.  When I tried a bit greater, the image seemed too soft.

ShootandEdit-GoodNight-edit

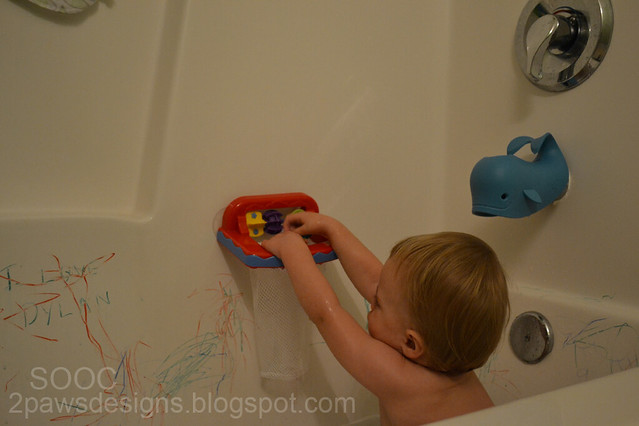
I like how it turned out.  Still retained a bit of the softness and quietness of bedtime, but sharpened up a bit for clarity.  Then, purely for fun since Ashley's second tutorial focused on bath time shots, I pulled out this photo I took earlier in the month of Dylan playing in the tub:

BathTime-SOOC

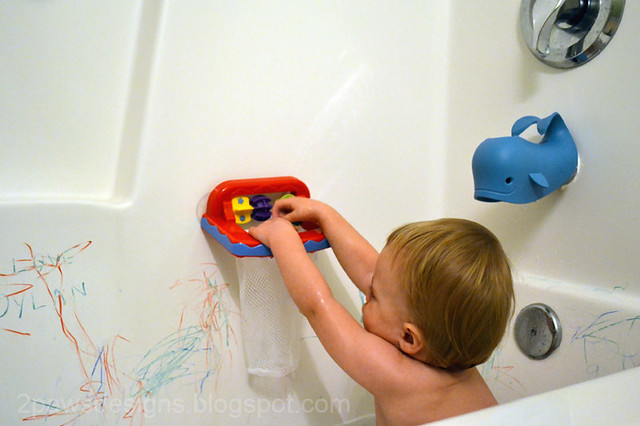
My version of Photoshop doesn't have some of the features her PSE has so I played around on my own starting with adjusting the levels.  Then I created a color balance layer (+1, -4, -12).  Cropped the photo to remove the bit of washcloth hanging in the top left (I just didn't like the look of it!).  Merged all the layers.  Used the noise filter, median (3 pixels), as I did in the good night edit.

BathTime-Edit

I feel like the colors are still slightly off, but I like the overall look and brightness much better!  Definitely fun to play around with and I'm sure I'll have more bath time photos in the future to edit!  :)

Join in the fun with Forever'n Ever'n Always Photography and Ramblings and Photos:

1/26/2011

Shoot and Edit: Good Night

This week's prompt for Shoot and Edit is what says "Good Night" to you. I had an idea for my photo almost immediately, but kept getting wrapped up in our evening rituals and forgetting!  Finally, last night I remembered and snapped a few shots.  "Good night" to me is cuddling with my sleepy boy just before his bedtime and reading books. 

ISO 3200, ss 1/500, f4.5
His lovey and Soothie (pacifier) are restricted to bedtime only so those are a big treat for him to see sitting out on his nightstand.  I'll let him have both as we read. Our books vary depending on what he selects but regular favorites are the two in the photo - Goodnight Moon and Night-Night, Little Pookie.

Join in the fun with Forever'n Ever'n Always Photography and Ramblings and Photos:

1/25/2011

card: Happy Healing

I actually made this card several months ago and forgot to share.  It's a lift of Get Well Card by KristiRae at Two Peas.


Supplies: Stampin' Up Kiwi Kiss cardstock; miscellaneous white, blue & ivory cardstocks; A2Z Essentials & We R Memory Keepers patterned papers; black stamp ink; Making Memories letter stickers; Band-Aids.

1/24/2011

December Daily 2010: Final Pages

The final pages in our December Daily album.  I decided to continue it through January 1st since that was the last day of our Christmas celebrations with family ...


And I created a page for November 30th to start the album since that marked the start of our Christmas (how could I leave out that memorable moment with Santa?) ...


All that is left is to create the title page and cover then have it printed at Shutterfly!

Supplies: Ali Edwards's December Daily Layered Template Package Vol 3 and 31 Days Overlays; Miss Mint's Winter Sparkle kit; Deena Rutter's Happy Christmas kit; Robyn Meierotto's Holly Jolly kit; Kate Teague's Holiday Lovin' kit; Betsy Tuma's Snow Kissed Christmas kit; Karen Funk's Christmas Magic and Fallin' For You kits; Rhonna Farrer's Celebration and Office Supply Mini kits; Instagram App on iPhone; Cherie Mask's Merry Brushes; Amienne and Another Typewriter fonts.

1/20/2011

Shoot and Edit: Good Morning edit

Confession, I'm really wishing I had one of these on hand at the moment.  The edit is making me hungry!

No Camera Raw.  I did try opening it as a raw image in PS and all I got was a grainy gray nothingness so I skipped that.  I opened the original image (on the right) as a .jpeg in PS and started with adjusting the levels.  I used the picker to set my white and black points.  Then I selected "enhance monochromatic contrast" in the Auto Color Options.  I returned to the levels window and adjusted the settings a bit until I liked the look.  The final settings were 14, 1.25, 255, 8, 255.

Next I jumped into Ashley's tutorial.  I followed it almost exactly.  I chose to eliminate a few of the layers (hue/saturation, black & white and photo filter) that I felt didn't quite give my image the look I wanted.  Here's the end result (click to enlarge):


Join in the fun with Forever'n Ever'n Always Photography and Ramblings and Photos:


ETA: For all I've made hungry with my donut muffin photo, I found a great recipe here.  Super easy & delicious (I made a batch immediately upon finding it!).  :)

1/19/2011

Cars Blanket

Yesterday Dylan and I went fabric shopping for a couple of gifts I am working on.  While browsing, we came across flannel with Disney's Cars characters Lightning McQueen and Mater.  Cars is a favorite of Dylan's right now and he was very excited.  I set the bolt across the cart in front of him.  He kept pointing at the cars saying, "ca, ca."  How could I not buy a little bit?

After he went to bed last night, I referenced two tutorials (The Crafting Chick's Minky Baby Blanket and A Feathered Nest's Simple Baby Blanket).  Using the Cars fabric and some dark brown minky dot, I made Dylan a blanket.  It's overall size is 32x36.


Perfect timing as a little impromptu gift for our sweet boy who turns 18 months today!  I gave him his new blanket this morning.  He immediately began running his finger around it making car sounds.  I'm taking that as "thanks, Mom!"  :)

1/18/2011

December Daily 2010: Days 21-25

Nearing the end of our December Daily pages, here are days 21 - 25:


Supplies: Ali Edwards's December Daily Layered Template Package Vol 3 and 31 Days Overlays; Miss Mint's Winter Sparkle kit; Tia Bennett's Juicy Accents; Vinnie Pearce's Punch Elements; Betsy Tuma's Snow Kissed Christmas kit; Deena Rutter's Happy Christmas kit; Robyn Meierotto's Holly Jolly kit; Amienne, Impact Label and 2Peas Old Type fonts.

1/17/2011

Shoot and Edit: Good Morning

Technically, I picked up this delicious donut muffin from a local bakery during lunch last Thursday.  But having a made from scratch chocolate donut muffin earlier in the day would definitely be a good morning, thus, it's my SOOC shot for this week's Shoot and Edit.


Join in the fun with Forever'n Ever'n Always Photography and Ramblings and Photos:

1/14/2011

Making Playdough

Dylan and I have been trying to keep occupied indoors as much as possible recently.  Even on the sunniest of days since the ice storm, it's been bitterly cold with a nasty wind.  We ventured out yesterday morning for fun with our playgroup, but after naptime needed something to do.  I finally got around to one idea that had been on my list all week - making playdough.

I used a recipe from my aunt...
Mix 1 cup of flour, half a cup of salt, 2 teaspoons of cream of tartar, 1 tablespoon of baby oil, and 1 cup of water in a large pot.  Warm over moderate heat, stirring until the mixture sticks together.  Knead after cooling.  Add food coloring and knead again.  Store in an airtight container.  If dry, add more baby oil.
I decided to let Dylan in on as much of the process as possible (obviously, not the stovetop part) so we started with the pot on the floor.   He helped me dump in the dry ingredients (and I quickly realized it might be a good idea to add a baking sheet under the pan to limit the mess).  Do you see the grin on his face??


Yes, there were a few minutes of happy scooping of flour & salt.  :)


We added the wet ingredients.  He helped me stir.  Then, I took it all away to the stovetop.  Amazingly, Dylan handled this pretty well.  We're at the point where if he wants something (such as playing with this mixture) and it's taken away, a tantrum might erupt.  Thankfully, this did not happen.  I held him up at one point to see what was going on but stated firmly, "hot. No touch."  Which resulted in Dylan blowing in the air [a mimic of us blowing on his hot food to cool it ;)  ].


After the ingredients were finished cooking and had a chance to cool, I pulled out the mixture in view of Dylan and carefully kneaded it by hand.  Then I brought it down to his level.  Split the mixture in two.  Let him help choose the colors.  I added the food coloring and combined it by hand as he watched.


Then I gave Dylan his two containers of playdough and told him to take them to his table.  Which he did (and yes, I enjoyed that little moment of direction following!).  And then he wasn't quite sure what to do next.


I plucked a bit from each and showed him how to squish it.  This got stares.  Interested stares but still a hint of confusion.  So I rolled them into balls.  Finally, something recognizable ...


and they were thrown because that's what you do with balls, of course.  ;)


** Updated 6/22/12: 'handy' tip for food coloring stained hands afterward - clean using a bit of baking soda and water. **
1/13/2011

Shoot and Edit: Winter edit

I liked my SOOC shot I shared earlier in the week.  Knew it needed a bit of editing.  Played with it some, but waited until today to really edit it and follow Ashley's tutorial.  Can I just say, "WOW!"  This is why I have an old version of Photoshop (using CS) and never worried about upgrading - I acknowledge that I've probably never used even 2% of what the program can do.  Since I don't own Adobe Camera Raw, I did a few small tweaks myself in PS (played around with the levels, brightness/contrast, saturation) before jumping into the advanced editing part of her post.  Stumbled a bit in following along, but it was so worth it.  As I said, I liked my photo before ... but now I LOVE it.  (Click on either photo to enlarge.)


Join in the fun with Forever'n Ever'n Always Photography and Ramblings and Photos:

1/12/2011

December Daily 2010: Days 16-20

Lots of celebrating (playgroup, holiday party, Dylan - 17 months!) and two special messages from Santa (a letter and a video message) rounded out days 16-20 in December ...


Supplies: Ali Edwards's December Daily Layered Template Package Vol 3 and 31 Days Overlays; Miss Mint's Winter Sparkle and Craft Jar kits; Tia Bennett's Fit 2b Tied kit; Karla Dudley's Holiday '10 - Word Art; Denna Rutter's Happy Christmas kit; Robyn Meierotto's Holly Jolly kit, Today word art and in stitches - holiday freebie; Rhonna Farrer's Typeset; Karen Funk's Christmas Magic and Fallin' For You kits; Sara Schmutz's School Is In Session papers; Betsy Tuma's Snowkissed Christmas kit; Batik Regular, Another Typewriter and Amienne fonts.

1/11/2011

Shoot and Edit: Winter

Yesterday while reading Jill's blog, I discovered the Shoot and Edit weekly challenge.  Since I'm trying to improve both my photography and editing skills, it seemed like a natural fit so I'm jumping right in with this week's challenge - winter.  It was a perfect fit with our forecast of snow and then, well, the snow never materialized so I dug back into photos from last month for an icy shot of the plum tree in our front yard.  Here it is straight out of camera (SOOC):


Join in the fun with Forever'n Ever'n Always Photography and Ramblings and Photos:


Of course, this morning I wake up to find a slight bit of sleet & ice from overnight! Going to stick to my icy tree shot from December though.

1/10/2011

Weekend Full of DIY Projects

We were busy around here over the weekend tackling and completing several in progress and new projects...

Trent installed our new storm door: 
Loving it.  Next I want repaint the front door (it's in desperate need of fresh paint after 8 years), remove the kickplate (it's also seen better days and not as visible now anyhow), replace the knocker (again, looking rough, but I love the general look and it's built-in viewer so I'm searching to see if I can locate an exact replacement) and find a new door mat (talk about seeing better days - yikes!).  I suppose it's time to part with our final Halloween pumpkin too.... hmmm ...

Trent also finished replacing the second of two not so attractive light fixtures in our upstairs hall that were builder installed with a much nicer aged bronze model that matches other fixtures we've added over the years:

In the guest/computer/art room (maybe I should just start calling it our "multipurpose room" ?), I took down the large antelope print: 
Love it, but didn't love it in that location.  The large frame and a beach print once looked great when over the headboard of our then "guestroom only" room a few years ago, but was always a bit out of place once I rearranged the furniture before Dylan's birth.

I used a giftcard from Christmas along with a sale + extra 25% coupon and bought these frames at Michaels last Friday:

Paired them with my own photographs from our beach trip in September (cropped and enhanced with Little Perk Action from The CoffeeShop Blog - click on images to see larger):

The result - an entirely new look and no money out of pocket:

Finally, I finished painting our kitchen!  Yes, the same painting that I started in early December.  I had hoped to finish before Christmas, but quickly realized that I didn't have the time and put it off.  This weekend, I tackled it.  All that is left is to finish recaulking the counter tops which I hope to complete later this week.