2/28/2011

Valentine's Morning

Dylan on Valentine's morning checking out his gift.  I love that he took the time to "read" his card.  :)


Supplies: Erica Hernandez's Letter Template #23; Karla Dudley's Sunkissed papers; Biograffiti + Deena Rutter's Whole Lotta Love kit; Audacious Designs Good Dog kit; Instagram app; Pooh font.

2/25/2011

Shoot and Edit: Pink edit

I started my edit in Photoshop adjusting the levels and then used the Color Pop 2 action from the CoffeeShop Blog.  After it finished, I turned the various layers on and off to see what I liked.  I ended with the background, B&W, Sharpen and Color Pop Vignette on.  With the Color Pop Vignette layer, I reduced it's opacity to 20%.

I was hoping to use either the Color Pop or Decaf layers but both left the hat looking really washed out.  It's truly a pale pink and already lost a bit of life in the photo from the strong sunlight so those layers didn't work for me.  I did like the sharpening and the slightly darkened edges the vignette layer created.

Finally I rotated the image 2 degrees counter clockwise to straighten out the sidewalk joint (it's slant to the right was distracting to me!) and cropped the image tighter around the hat.  I'm quite happy with the end result:


Join in the fun with Forever'n Ever'n Always Photography and Ramblings and Photos:

2/24/2011

Kudos

I've blogged about both my JJ Cole diaper bag and Maclaren stroller in the past.  Love them both for their style, practical use and affordability.  Add to that fabulous customer service by both companies.

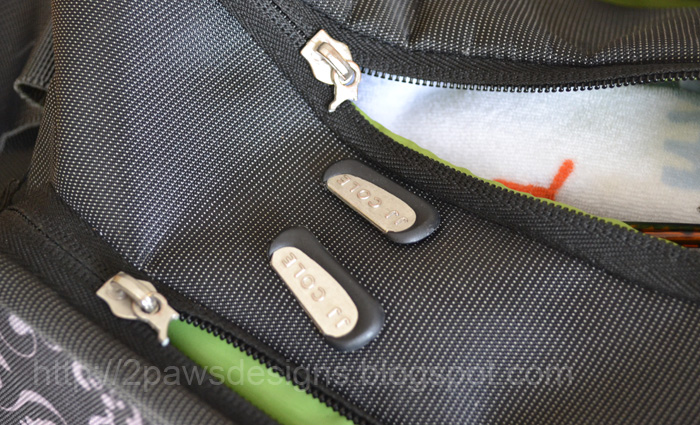
I first contacted JJ Cole last year when the fabric on my original System bag began to pull apart.  I had barely used it 6 months.  They were quick to respond and not only ship me a brand new bag, but the newer System 180 which is a bit bigger.  Fast forward to this year and two zipper pulls snapped on me in a week's time:


I still need/use my diaper bag to tote around our daily essentials from diapers and wipes to snacks, sippy cup, change of clothes, etc.  And I still need it to zip up.  So, I called JJ Cole again.  I explained the situation from the bag replacement last year to the zipper pulls breaking now.  I was not looking for a new bag, just new pulls so I could still use my bag.  No problem.  A couple days later I had my pulls and just like that I'm back to a fully functioning bag!  Yay!


With the Maclaren Volo stroller, I had a small tear issue.  The fabric was pulling apart/tearing at one front corner of the seat where it was sewn:


I called Maclaren and spoke to a very friendly customer service representative.  I explained my problem and emailed him photos.  The following week, I had a brand new seat cover!


I really appreciate the great customer service from both companies!  It's nice to know that there are companies that still stand behind their products.  :)

Note: Review contains my personal opinion and was not requested by nor a requirement of either company.

2/23/2011

today ...

I'm trying to capture "everyday" moments in Dylan's album as well as the bigger ones.  This particular page is about our visit to the library a couple weeks ago for toddler time and reading.


Supplies: Design House Digtial Fall Blog Hop kit (paper by Karla Dudley); Sweet Caroline Studio's Weathered Frames; Pink Trike Design's Word Art - Today; Century Gothic font.

2/22/2011

Crayon Roll

Making a crayon roll has been on my to-do list since before I was even a parent.  Kept thinking I might make one for my nieces or nephew.  Like so many other good intentions, it hit the back burner.  Then a few weeks ago, two of my mommy friends made some (check out Allison's awesome froggy roll) so, naturally, I had to do it too!  :D

Here's the completed roll:

Open and full of crayons:

The outside (loving this cute fabric!):

Detail shot of the inside:

I bought the fabrics on Etsy.  I was so excited when they showed up later that week that I sewed the roll that night.  I followed this tutorial at the Pleated Poppy.

Supplies: cotton fabrics; flannel; thread; hair elastic; Making Memories button (yes, I raided my scrapbooking stash for this!)

2/21/2011

Shoot and Edit: Pink

Being that I'm not the most girly girl and I share my home with my husband & son, there isn't a lot of pink around.  My son, Dylan, actually inspired this photo.  He's so good at putting on his own hat before we head outside and now likes to stick this one on me.  I had planned to photograph some pink sidewalk chalk when he literally knocked me in the head with this idea!  ;)  I do love my pink NC State hat.

ISO 100, ss 1/400, f8.0
I took this shot without looking.  I didn't like the angled view from where I was sitting and I was too lazy to lay down in the grass!  So, I held my camera at my side, half pressed the shutter button to focus and then snapped it. 

Join in the fun with Forever'n Ever'n Always Photography and Ramblings and Photos:

2/18/2011

Shoot and Edit: Love/Romance edit

I went round and round on my edit this week.  I think I set myself up for a challenge when I chose to use a photo with so little color.  Thank goodness for the snapshots option in Photoshop's History window.  Every change or two, I made a snapshot.  Then I went back and forth between them seeing what I liked and didn't. 

I meant to take notes of the steps - part of my reason for doing the snapshots was to make that easier.  Then I forgot to check before I closed the window and, of course, this would be one of those times where I did not save a .psd file.  That said, to the best of my memory here's what I did ...

  • Adjusted the levels.  Setting the white and black points, shifting the input and output until I liked what I saw.  
  • I used the clone tool to clean up around the top of the ring holder.  It looked dusty in the original photo.  It wasn't - just the way the light was bouncing off the top. 
  • Created new layer for high filter.  Lowered the layer's opacity to 75%.  
  • New adjustment layer - curves.  Adjusted settings for shadows, midtones, highlights.  (My version of PS does not have the awesome graph in the background - just a grid - so jealous of that! I think it would make my process a bit different.)
  • New adjustment layer - brightness/contrast.  Adjusted slightly.
  • New adjustment layer - hue/saturation.  Adjusted saturation only.
  • New fill layer - gradient.  Changed the angle and scale.  Layer mode to soft light. 
  • New fill layer - solid color.  I used a very light yellow and reduced the layer opacity.


Join in the fun with Forever'n Ever'n Always Photography and Ramblings and Photos:

2/17/2011

Coffee Filter Painting

Dylan and his buddies love to get crafty.  And definitely love painting but that can get a bit messy.  It worked out well a few months ago when warmer and we could strip the boys to nothing but diapers in the garage and let them go crazy with paint and canvases.  A bit too chilly for that now which is why I was excited when I found the idea for coffee filter painting in this post at Strings to Things blog.

For our adventure, we taped coffee filters down to plastic covered cardboard (one of the moms had these on hand from a recent purchase.  Taping these down to the high chair tray would work great too).  Gave the boys a couple of markers each to color the filters.


Dylan surprised me by having very little interest in this coloring portion.  He did a couple scribbles on two of his filters and went off to play with toys.  I scribbled on the remaining filter so we'd have something to paint later.  The other two boys really got into this part though and had quite colorful creations.  When the "paint" (aka water in a little bowl) and brushes came out, they all got excited and had a great time.  As you can see, Dylan was very serious about this process.  Well, until he and his buddies figured out how to fling water. ;)


Dylan and I repeated the process a few days later when bored and stuck at home.  I love how easy it was and such little mess. After the filters dried, I cut hearts from a few and glued them to Valentine cards for his grandparents.


I've saved the remaining painted filters.  Thinking they might end up in a scrapbook page. :)

2/16/2011

Shoot and Edit: Love/Romance

I struggled with this theme.  I had a few ideas.  Then wasn't pleased with the photos I took.  Finally, after seeing Koreen's post at Winn's Window, I was inspired.  The idea in her first photo of rings on a small Eiffel Tower sculpture hit me.  I immediately grabbed my rings & ring holder and began shooting.  My favorite photos, truth be told, were those first shots I took.  I had placed the holder on the window sill in the afternoon sun.  The lighting was perfect.  But I wanted both our rings in the shot.  Since I had to wait for Trent to get home from work, I set up my lightbox and "set the stage."

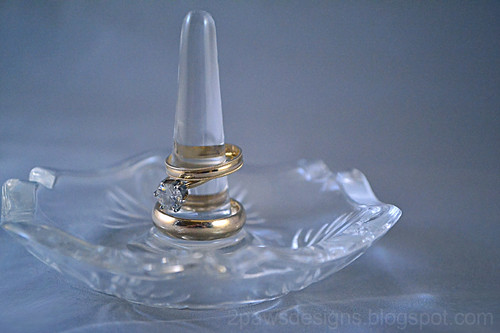
Here are our rings directly as they are.  A bit scratched up.  A bit in need of cleaning.  But beautiful nonetheless.
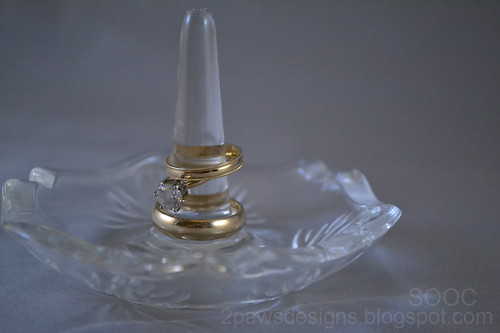
IS0 3200, ss 1/200, f5.6
To me, I see so much in those rings.  I see our love, our romance, our family, our home, our past, our future.  I remember those amazing moments they represent.  I smile.  And I laugh.  I laugh because of a single moment during our wedding where these rings caused the two of us to giggle.  It's the reason his wedding band is at the bottom and mine at the top - separated by my engagement ring.  During our wedding ceremony, when our pastor held our rings to bless them, my band became stuck inside of his!  Who knew they would fit so perfectly together.  So, for a few seconds there (although it felt much longer) we stood there while our pastor fumbled to separate them and we began to laugh. In the end, they came apart and the ceremony continued.  I love that memory.  I loved that day.  I love my husband and our life together.  So, yes, this sums up love and romance to me.

Join in the fun with Forever'n Ever'n Always Photography and Ramblings and Photos:

2/15/2011

A Birthday Full of Cars

Our neighbor turned 3 over the weekend and loves cars so what better than a race car birthday card?


Supplies: Stampin' Up cardstock, inks & Celebrate stamp; Provo Craft sticker.

I had planned to give him a car to go along with it.  He loves the Hot Wheels/Matchbox type cars and has quite the collection.  That latter part is what stopped me ... he has so many so maybe another car isn't the best idea.  Then I remembered 2 things.  One, I've seen him get in and out of the car with hands overflowing with the cars he's taken between home and his grandparents, etc.  Two, a while back I saw a great tutorial on another blog for making a Car Caddy.  Aha!  The perfect gift for the boy that loves cars.  Now he has a good way to tote a few with him and has a little play space to go along with it.  I see another one of these in the future for Dylan.  It's just so cute!

Car caddy folded up and ready for travel:

Unfolded and ready for play (cars store in the pockets at the bottom):

Supplies: assorted fabric from my stash; interfacing (I used to stiffen it up since my fabrics were thinner than those in the tutorial); felt; thread; velcro; acrylic paint